Git Management in Visual Studio 2022
Using Visual Studio 2022 to Make Git Operations Easier

Introduction
If you develop software on a Windows machine using .NET technology, then Visual Studio 2022 (VS2022) is by far the best tool for rapid application development (RAD). There are other tools - Visual Studio Code, JetBrains Rider, and others, but none provide the overall range of capabilities in RAD that VS2022 does.
This article does not address Git use in other IDEs or using the command line of GitHub Desktop. The focus of this article is on being able to handle Git operations within the VS2022 integrated development environment (IDE) so the developer doesn’t have to waste time hopping between interfaces for source control.
The article also does not address deployment or other “DevOps” processes.
Prerequisites
VS2022 with the “Git for Windows” Code Tools component and the “GitHub Copilot” AI Assistance component (can be installed with VS2022).
GitHub or Azure DevOps Git Accounts
Common Types of Operation
In the Beginning …
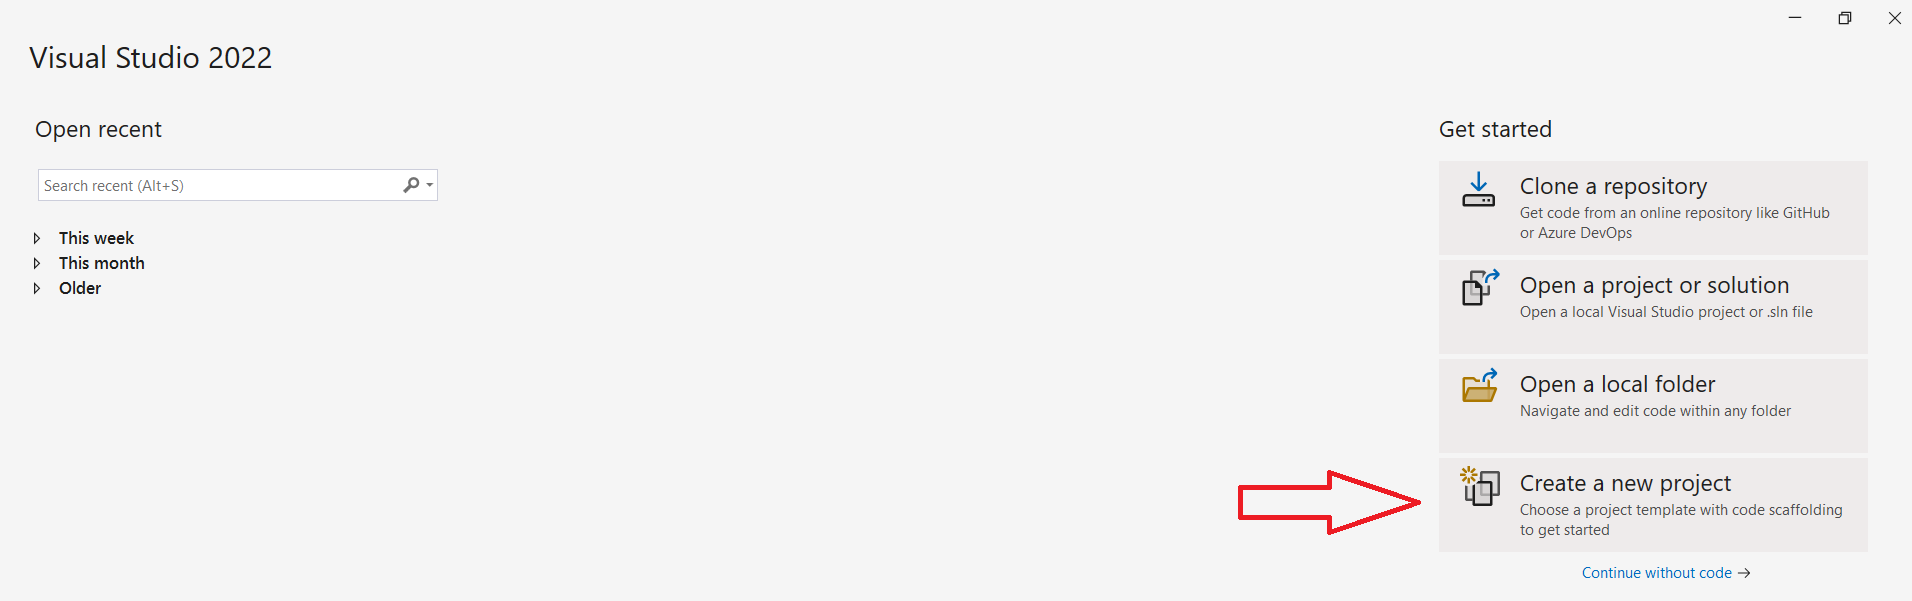
Let’s start with looking at creating a new project and integrating Git so we have source control.
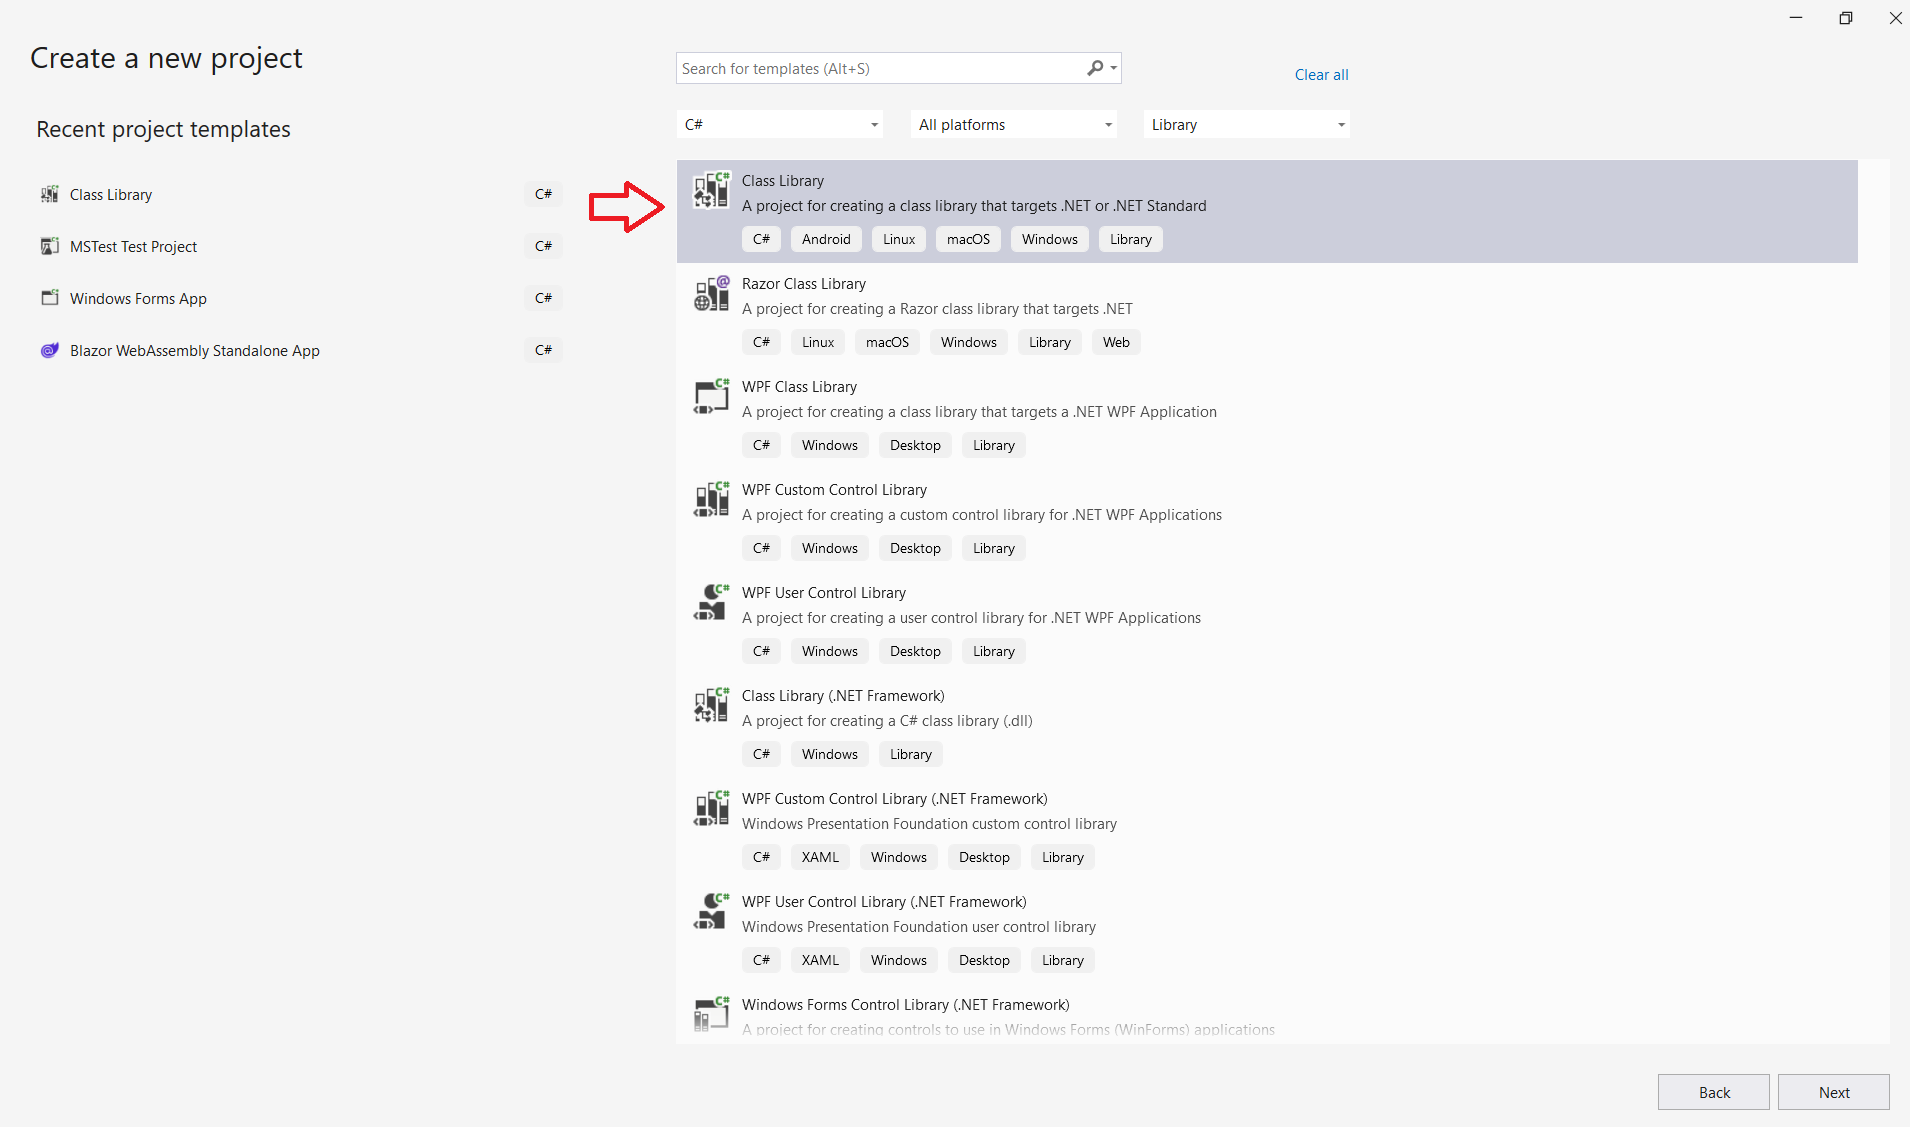
The project is a library project with a MSTest project in the same solution. It is built with C# on .NET 9, the current versions at the writing of this article.
Use VS2022 to create a project.
Select a library template.
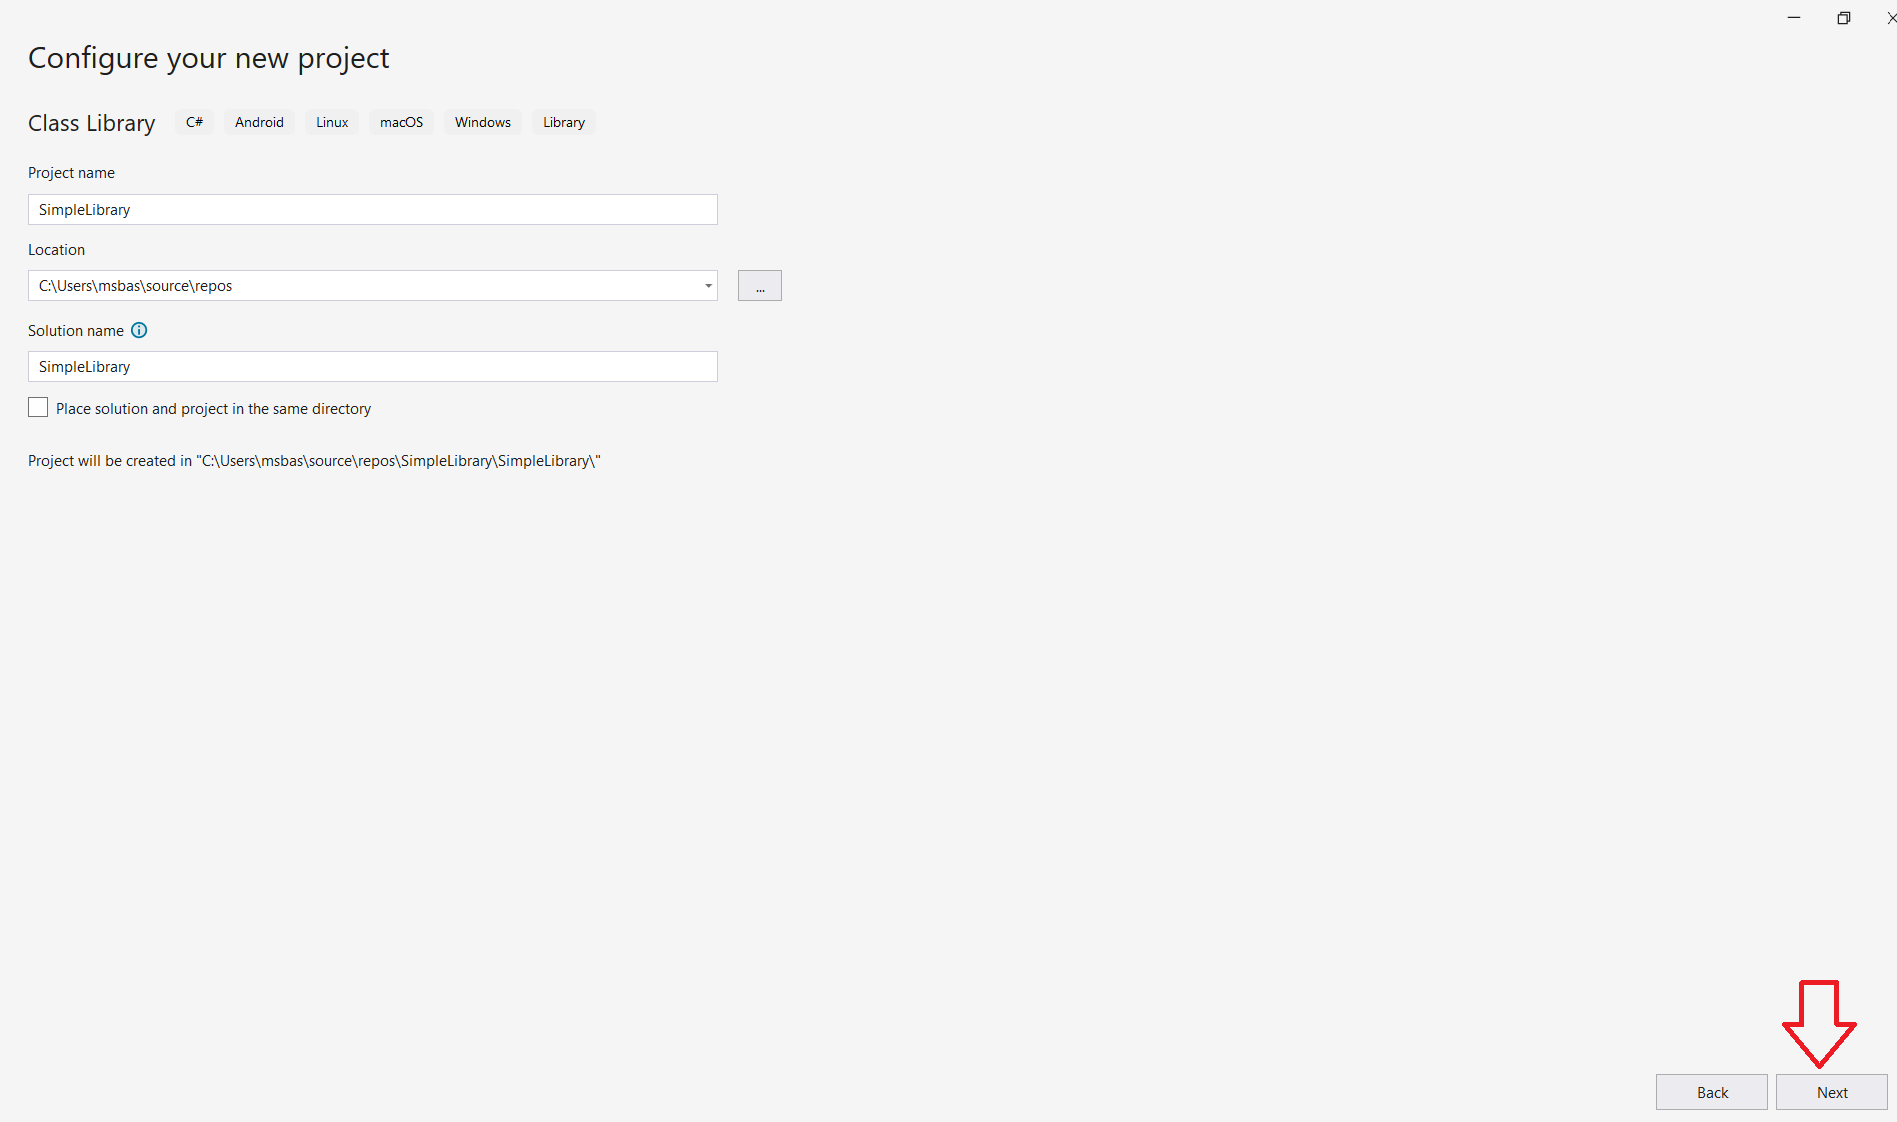
Give the project a name.
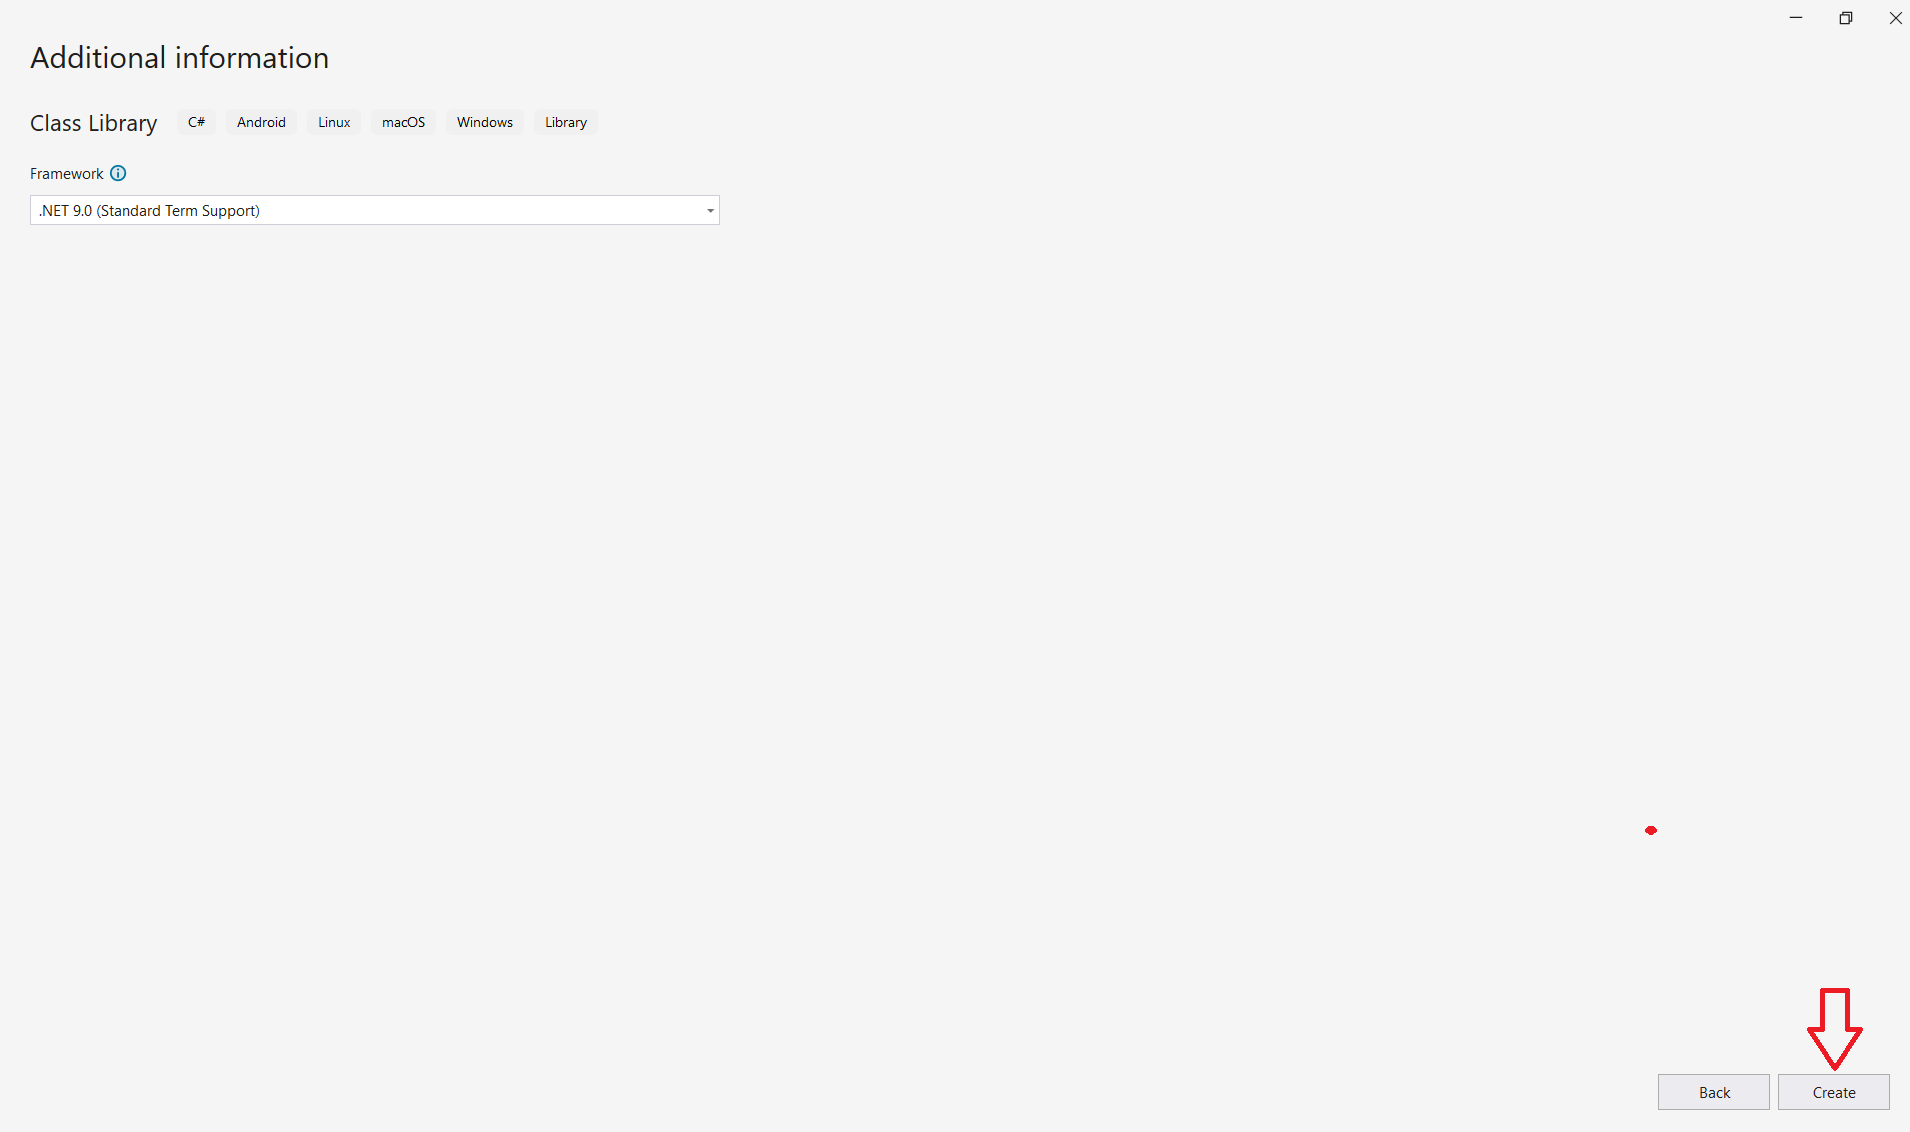
Choose the .NET framework to use.
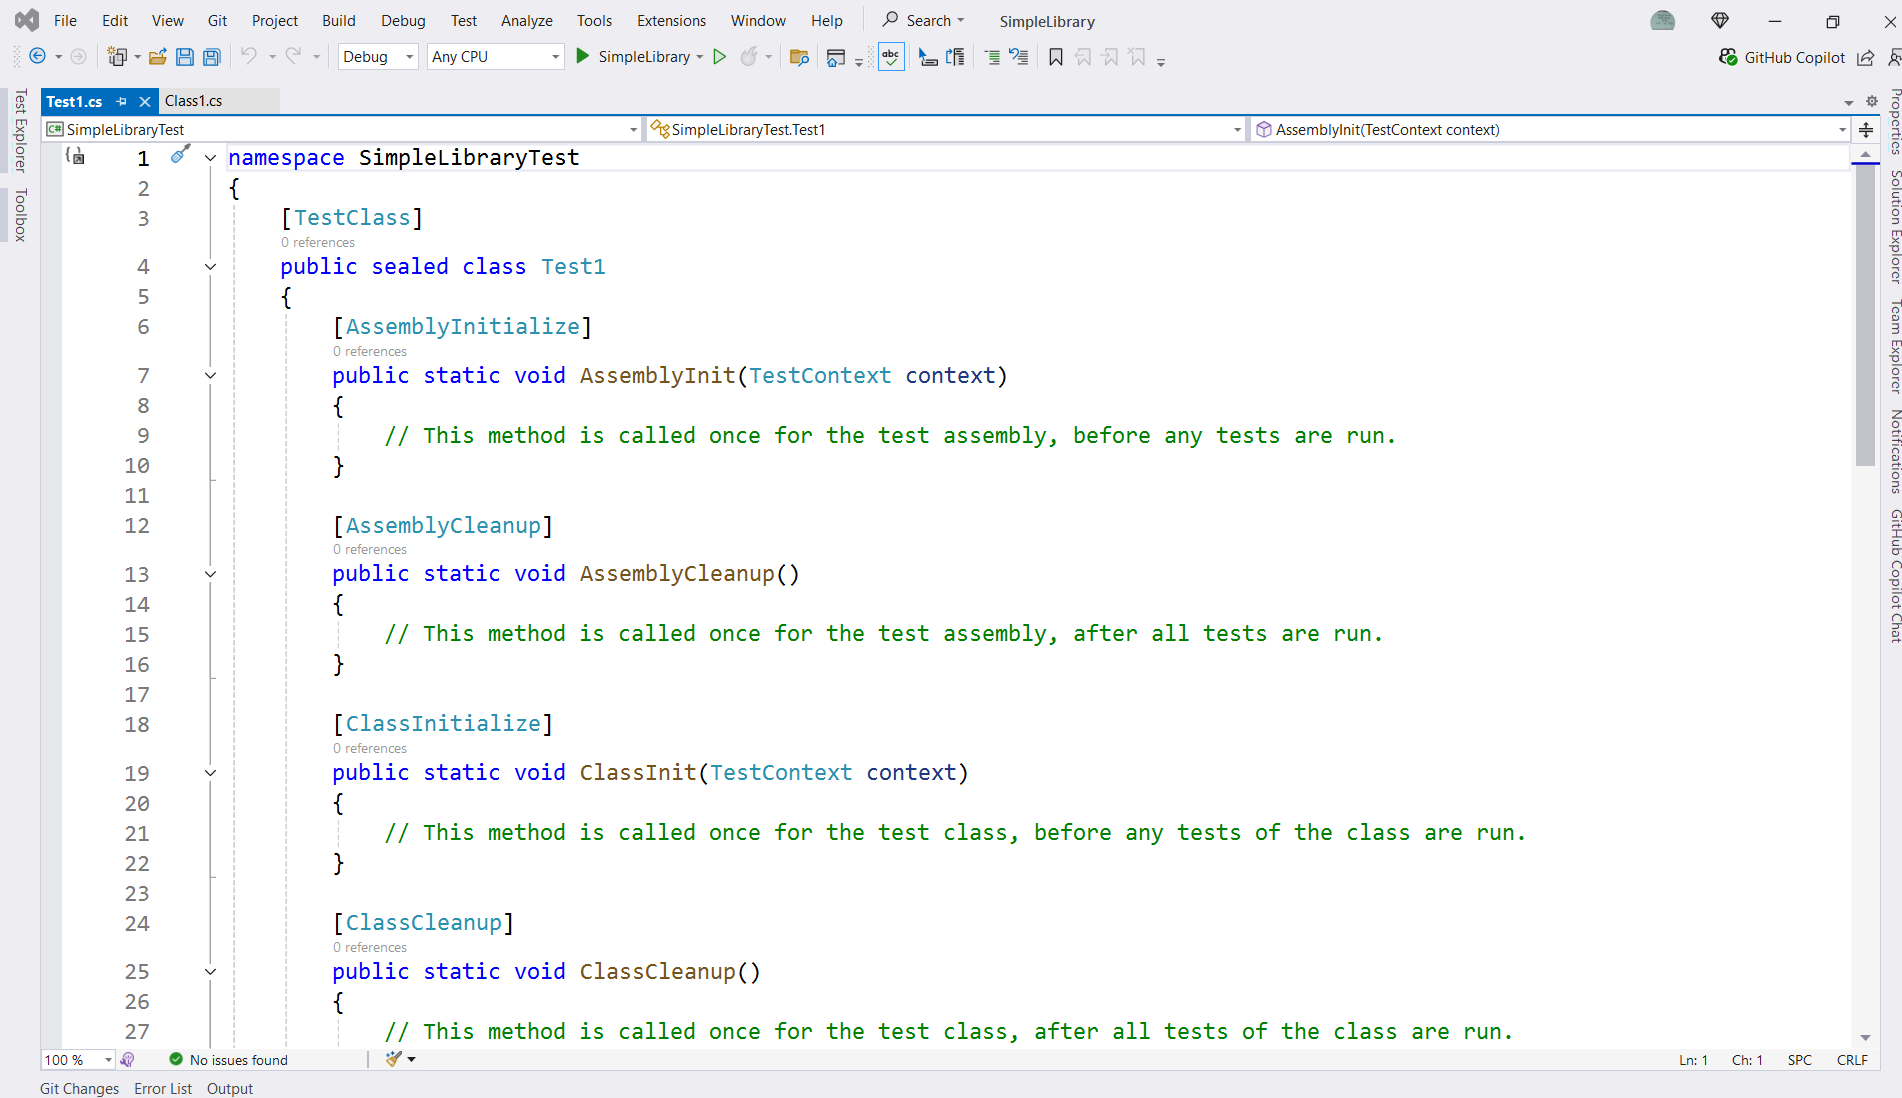
Now we have a library project.
Add a test project to the solution. See the “Addendum” at the end of this article for more on testing.
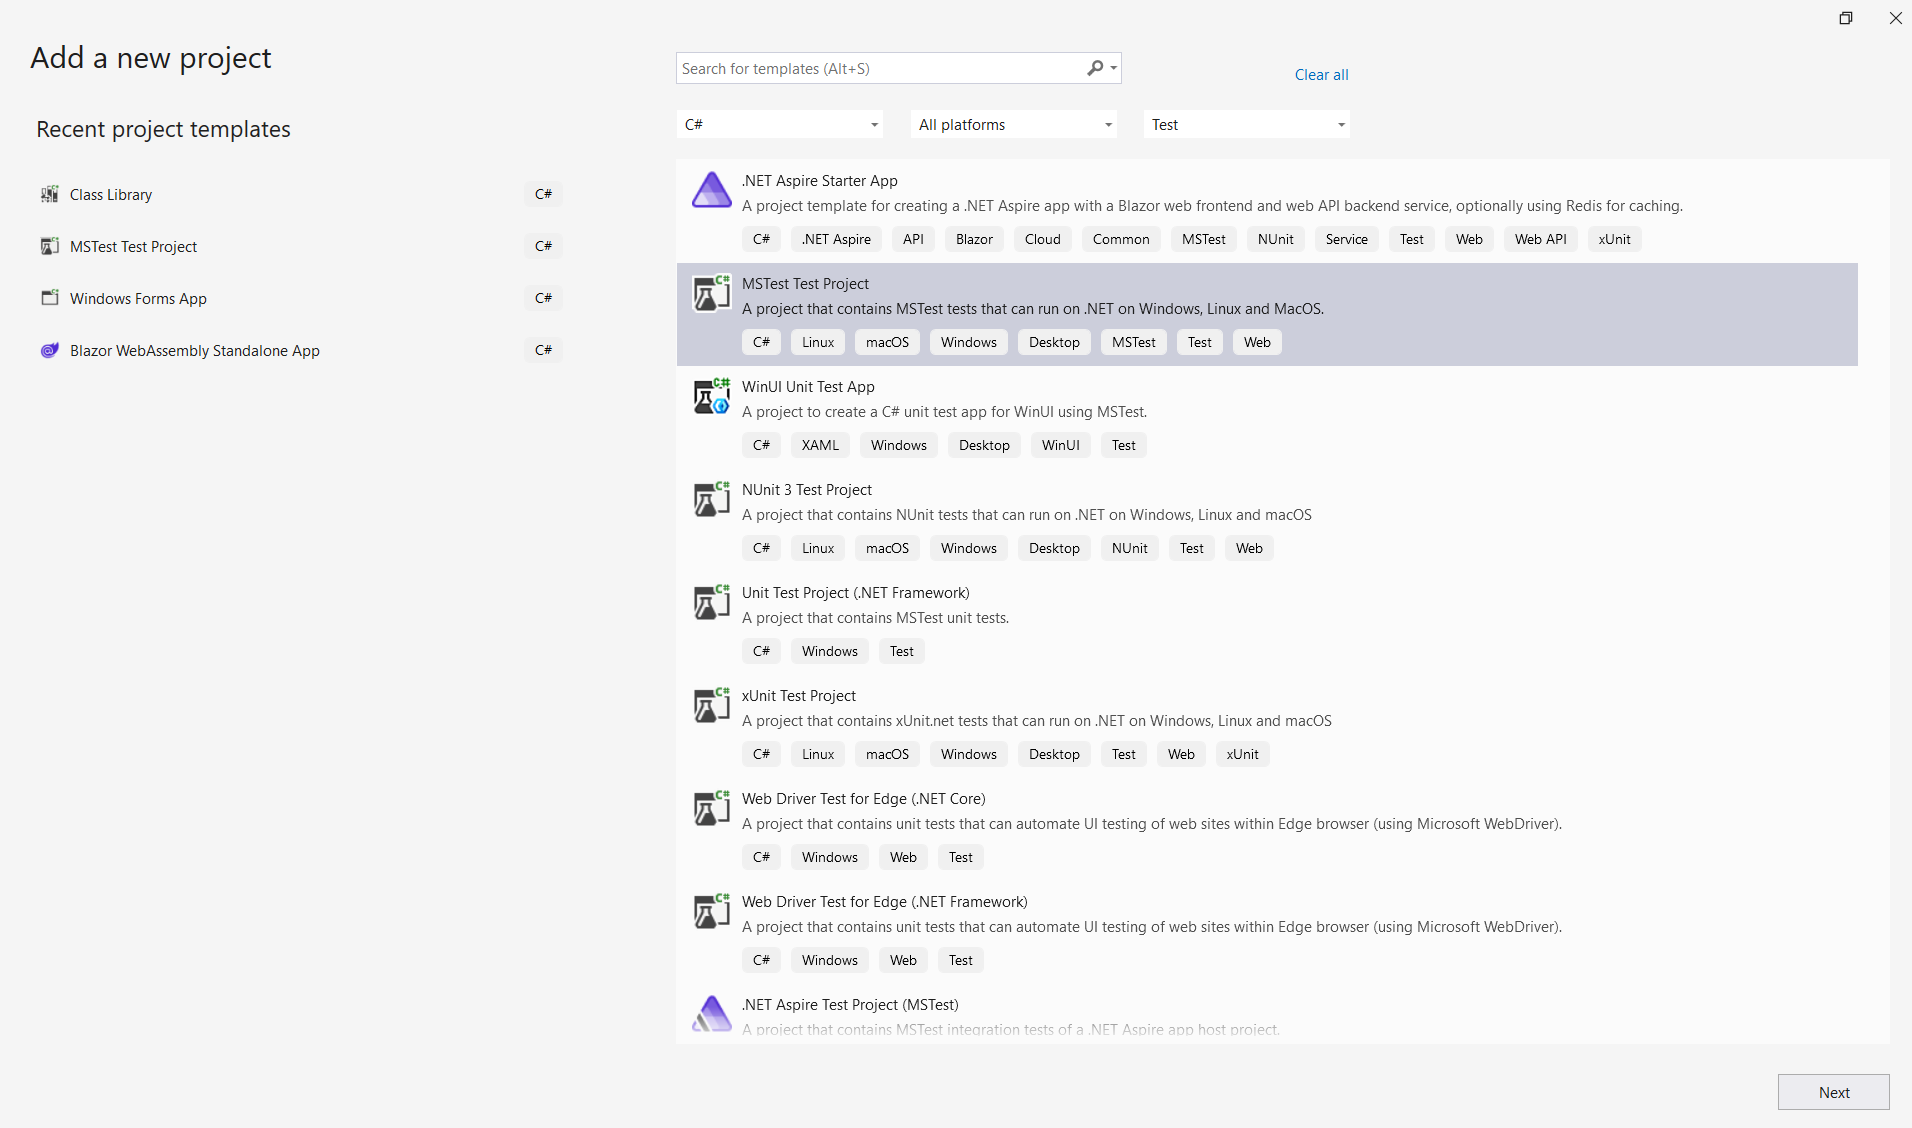
Name the test project.

Configure the test project.
Now we have a test project.
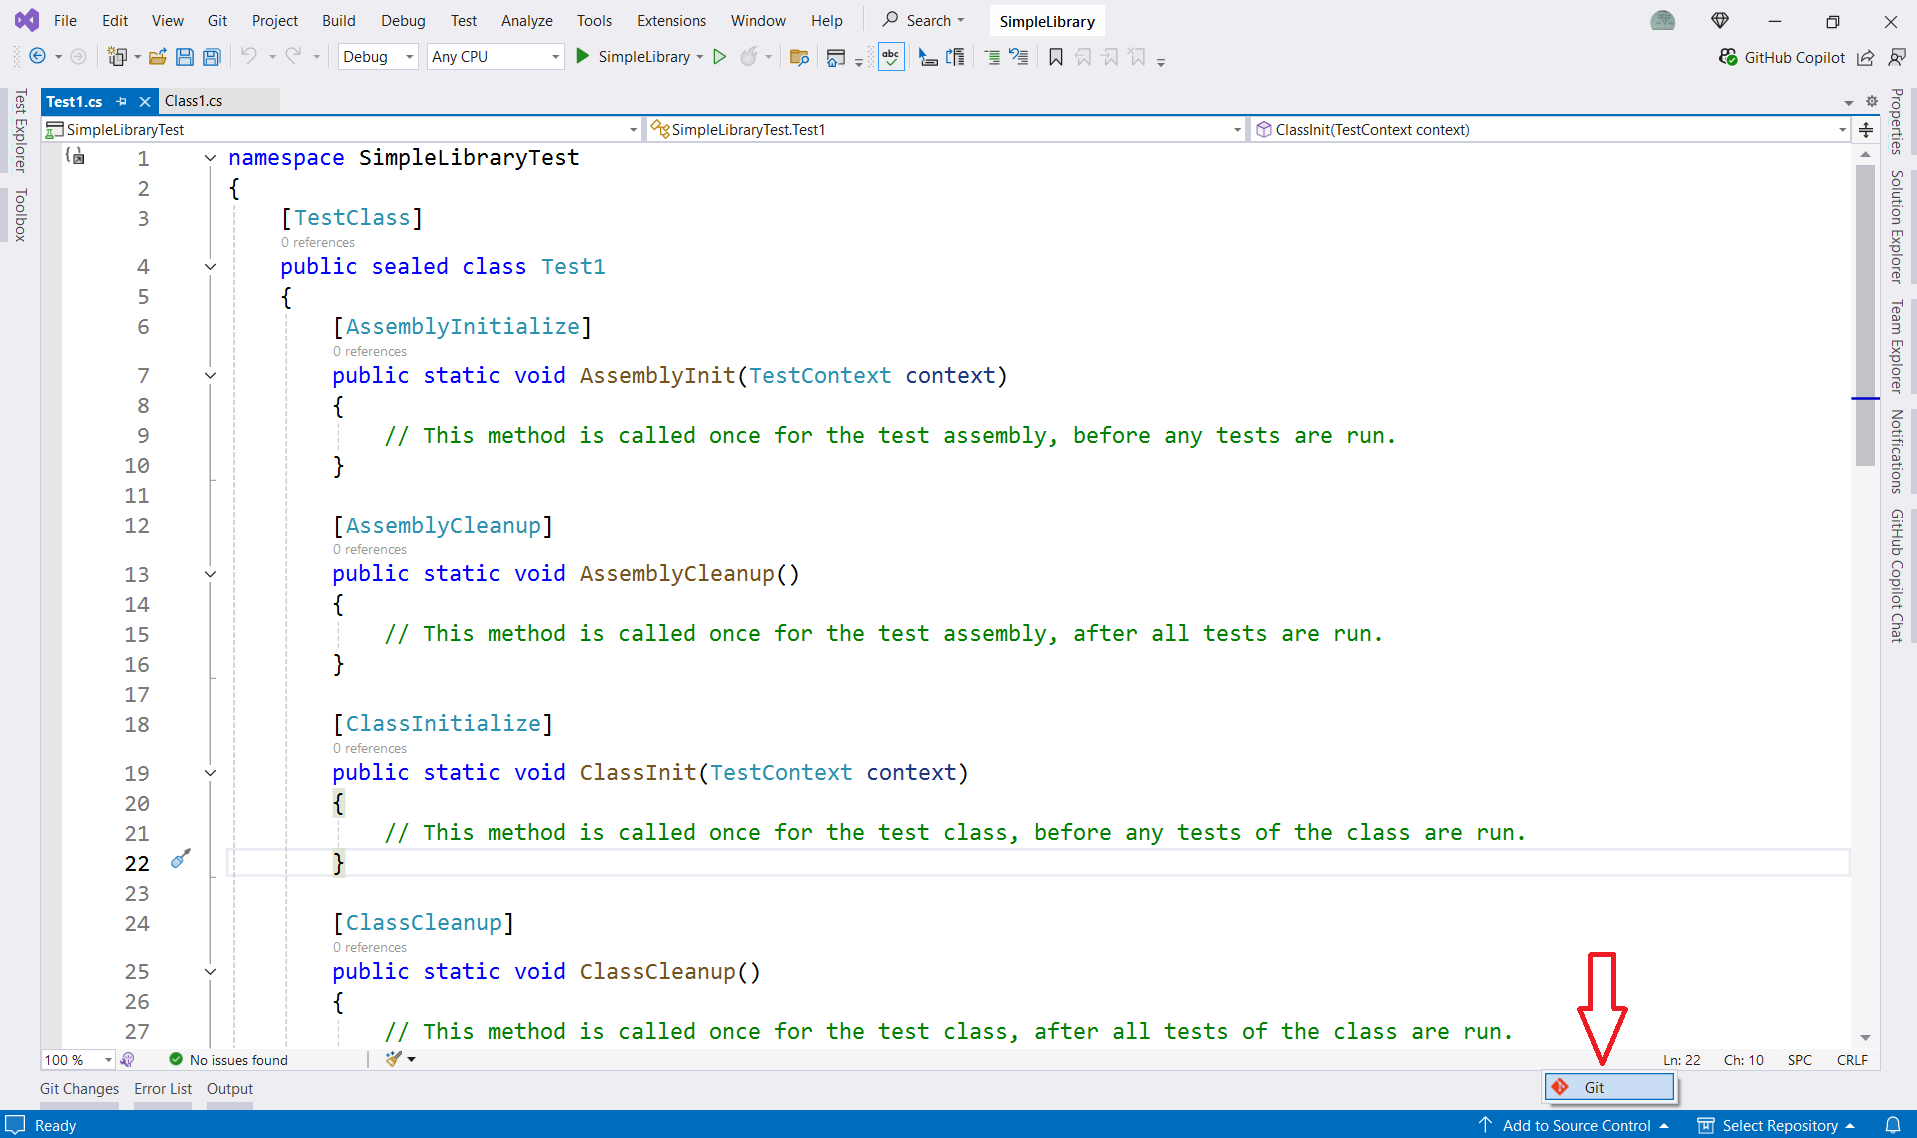
Since we have the basic solution, add to source control so any changes other than the initial creation from templates is recorded and saved,
Define the new repository.
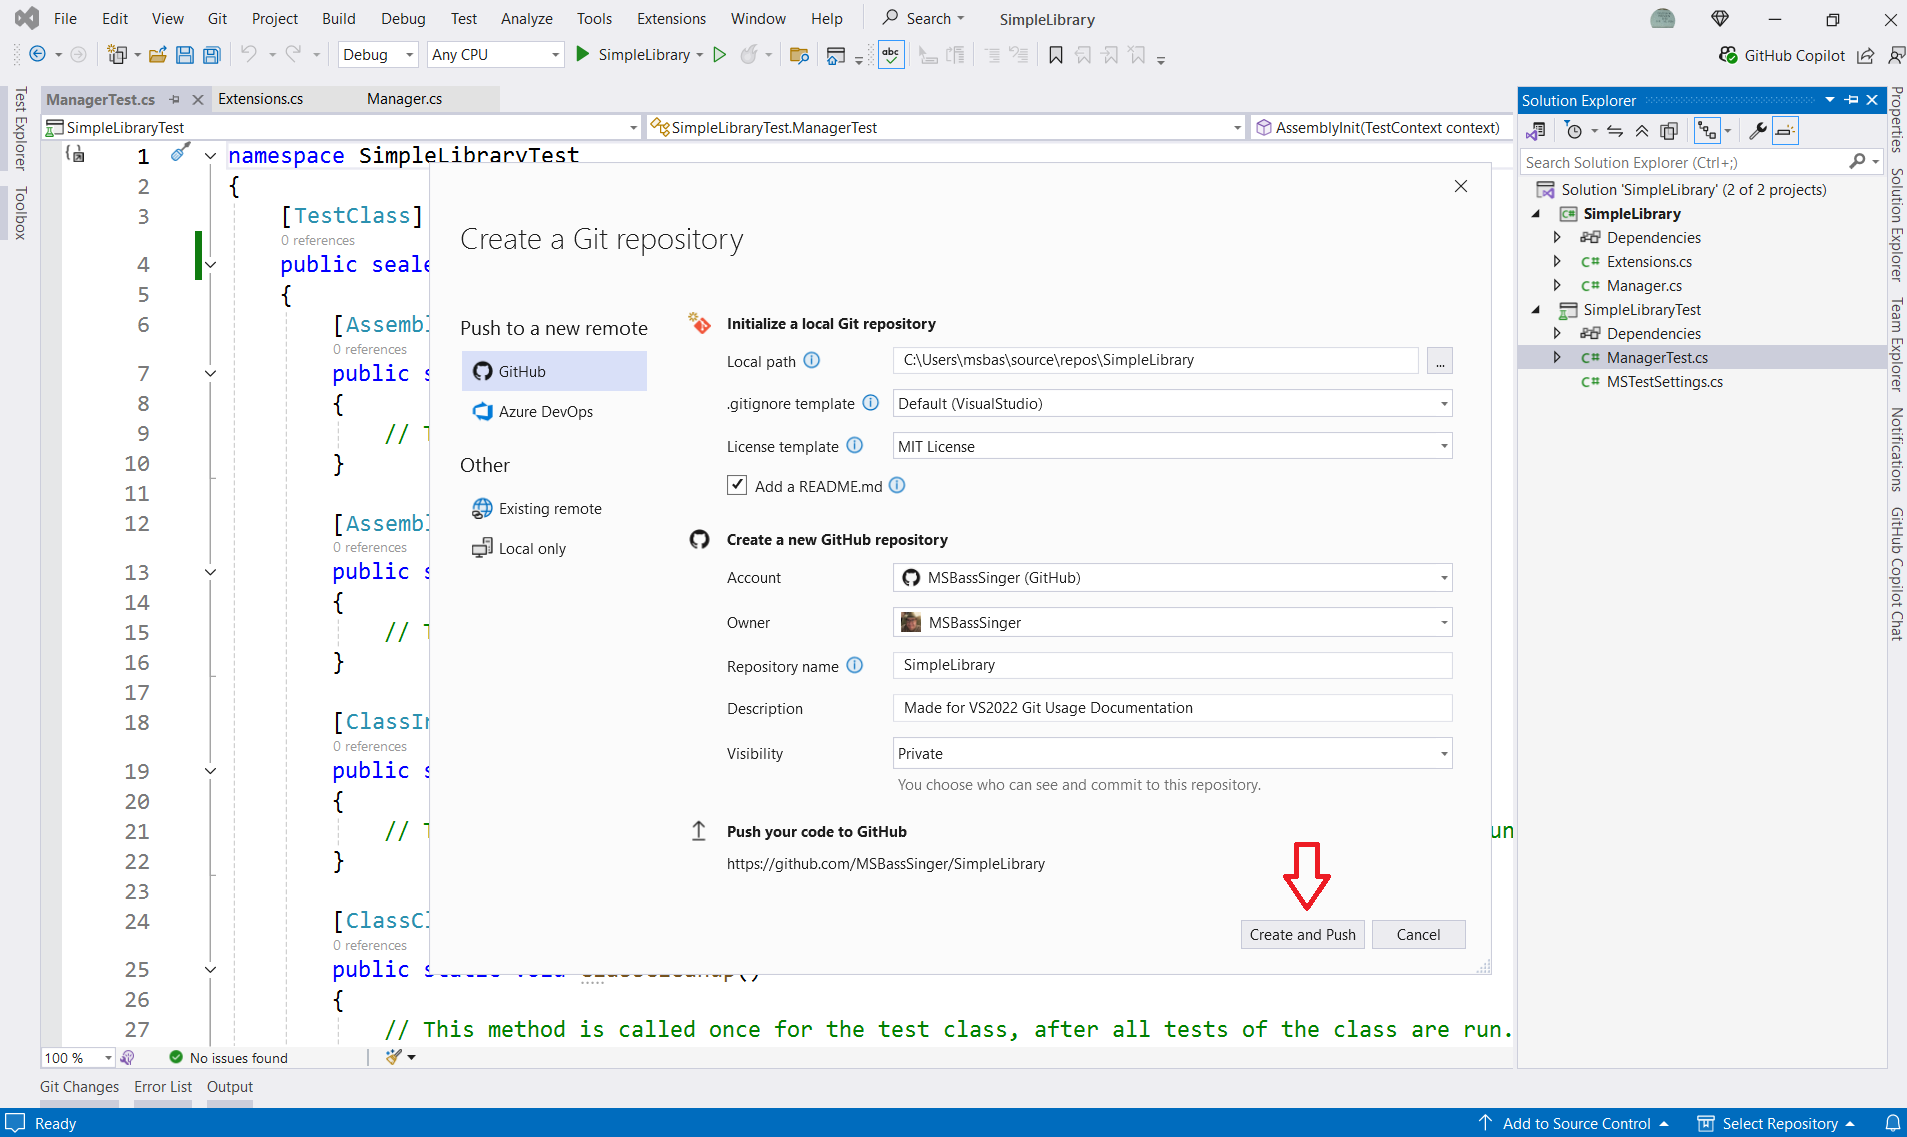
This will create the repo, and the code is pushed to the local Git repository.
Since this is the initial code, it should be pushed to the remote repository before coding starts. This gives a point in the commit history before there is any coding that changes the template-made projects and solution.
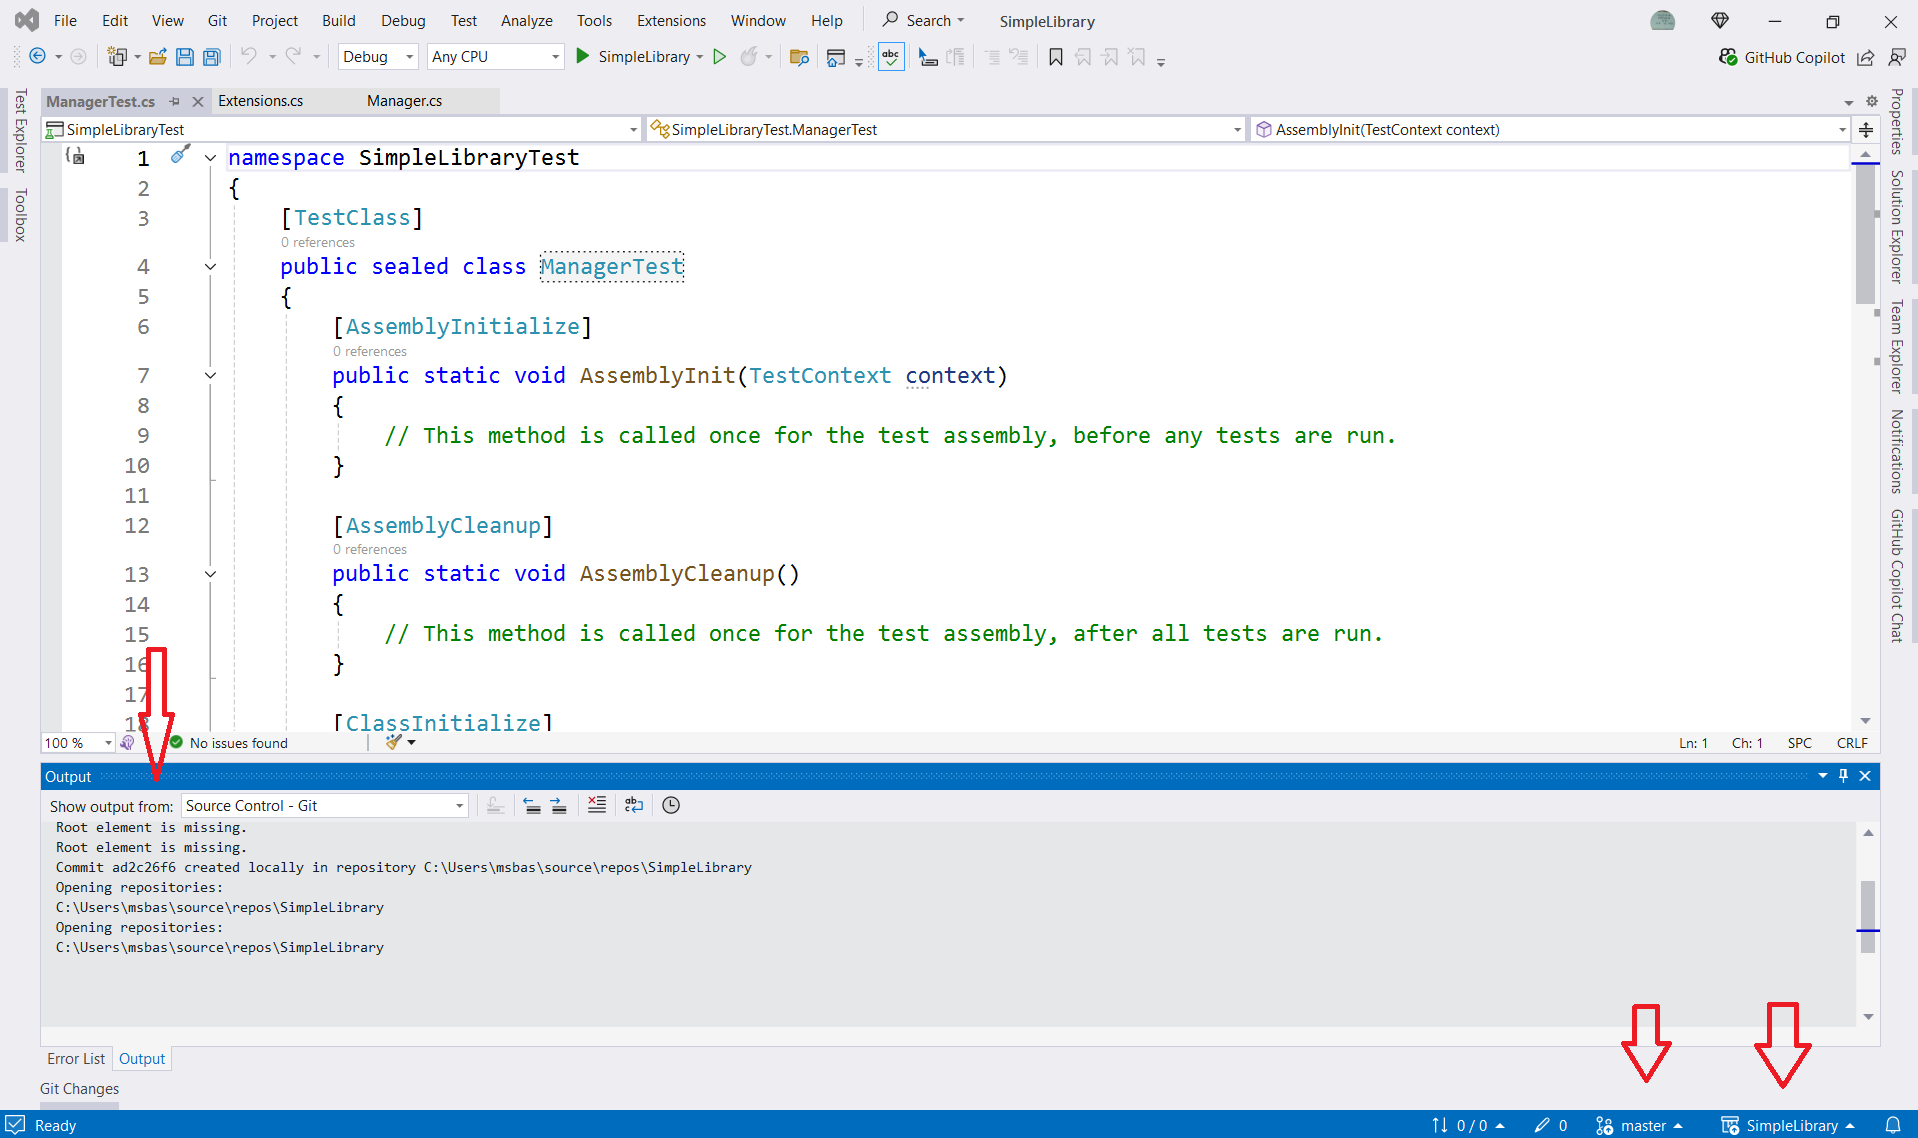
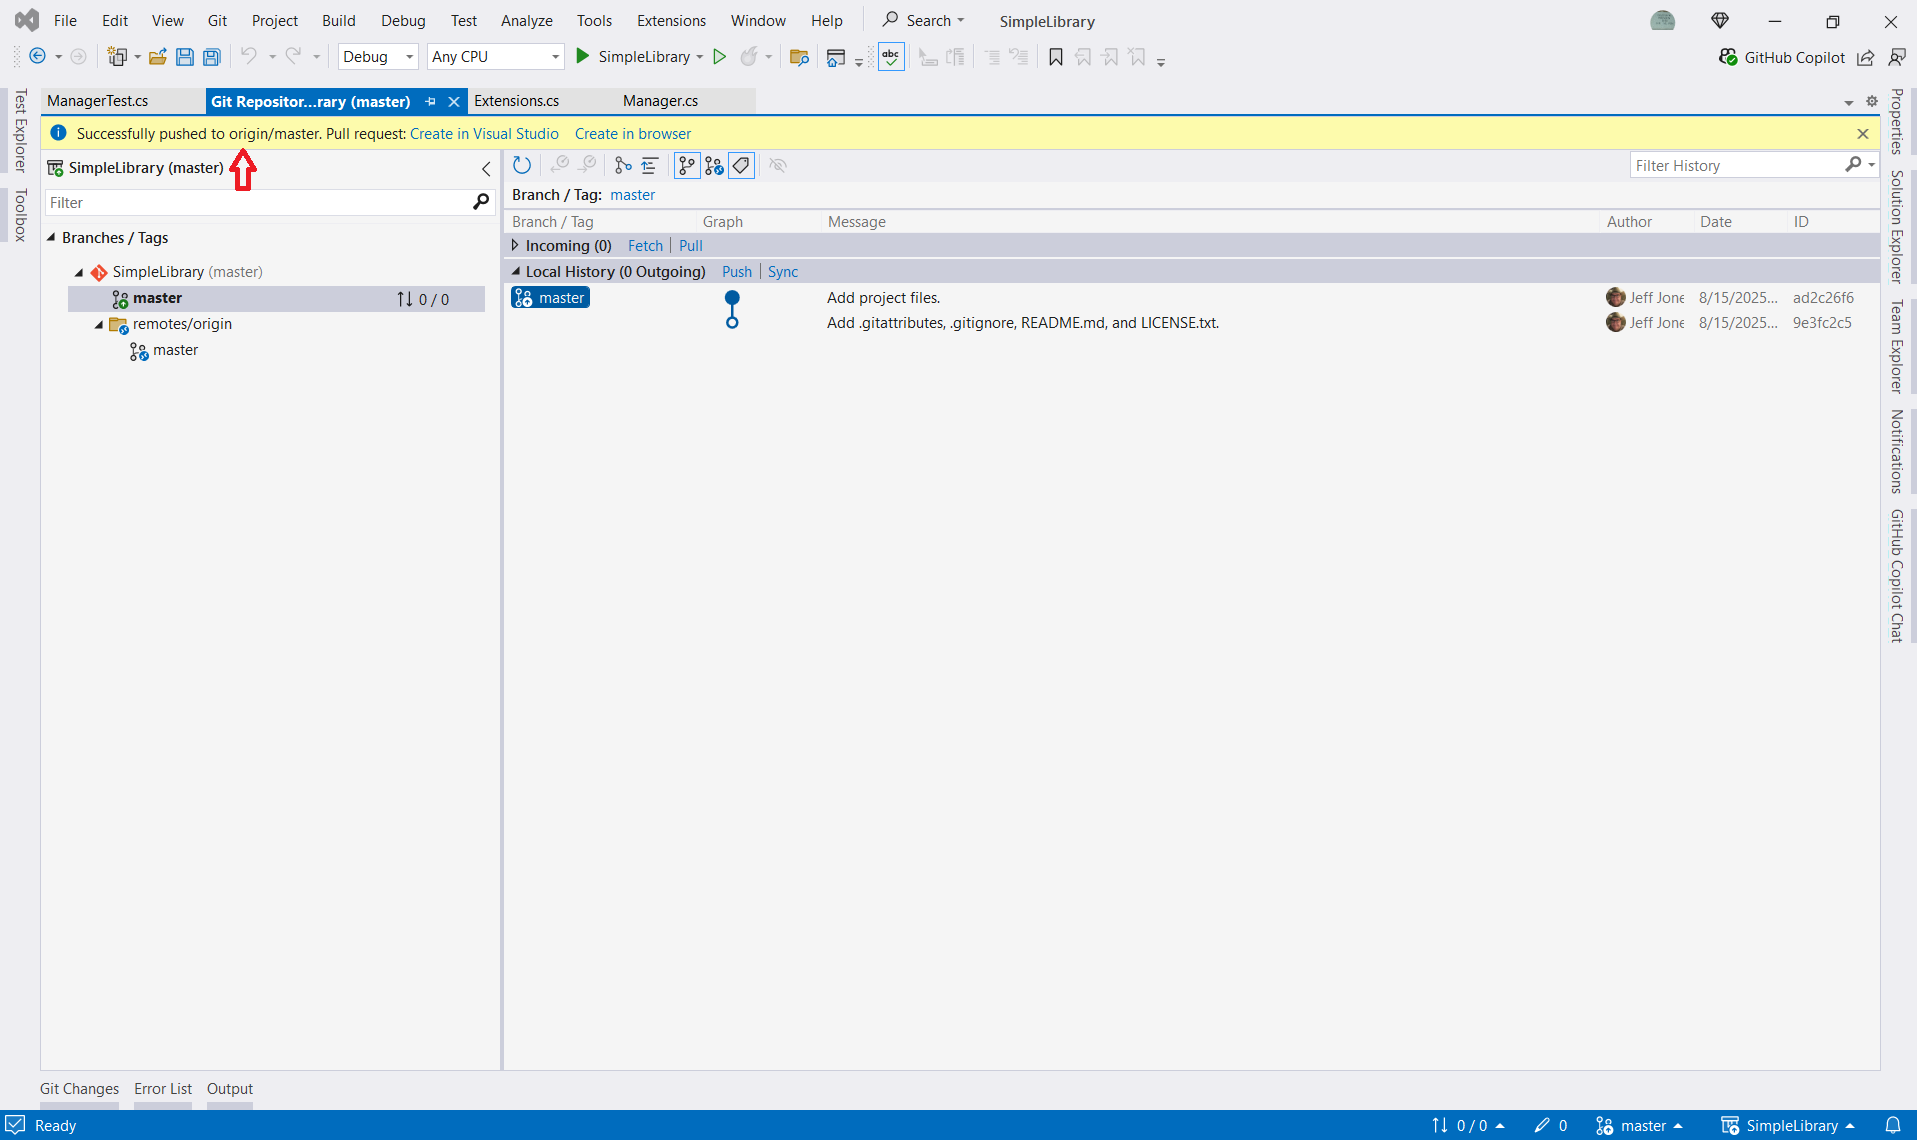
Now that the local and remote main branches are created and populated, it can be viewed in the Git Repository window in VS2022.
If the push to remote was not made prior, it can be done in the Git Repository window.
When a push is made, a confirmation of success or failure is provided.
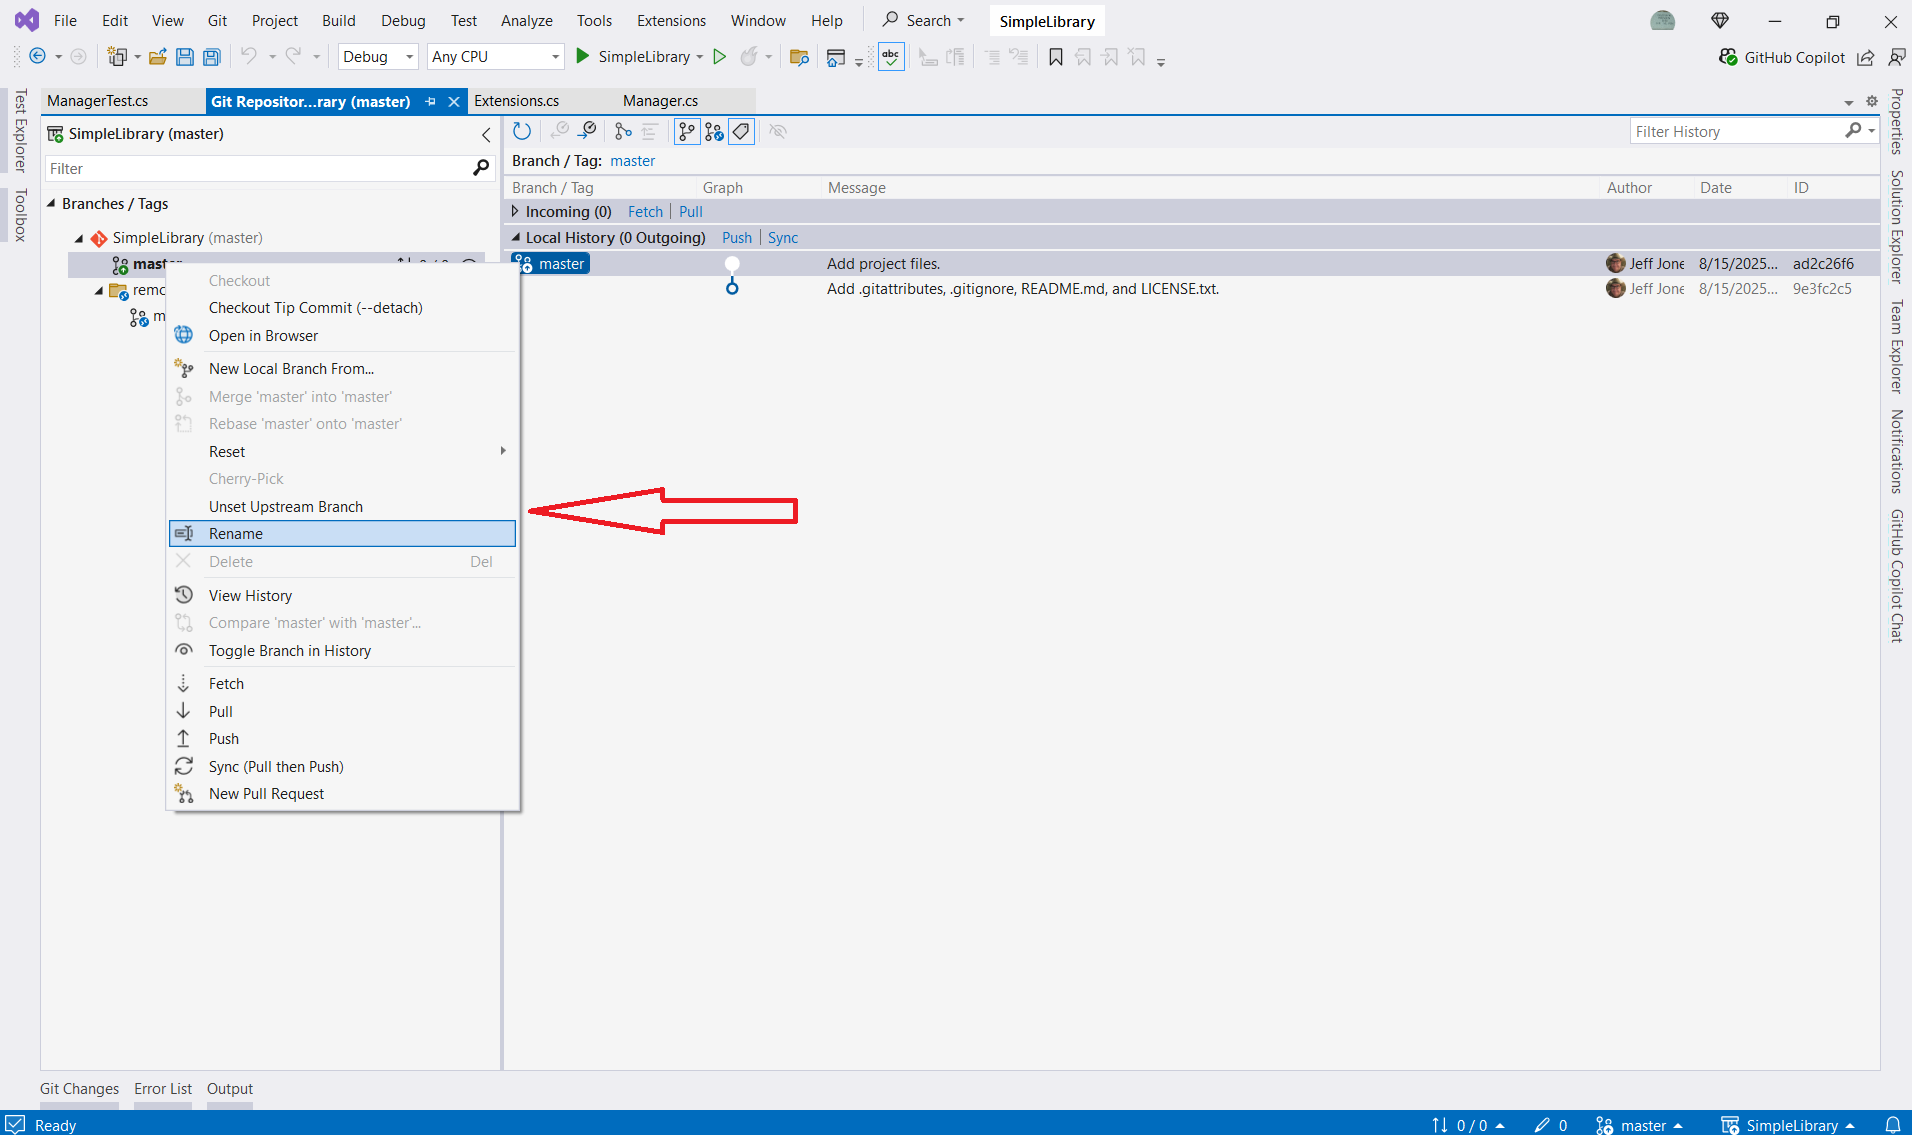
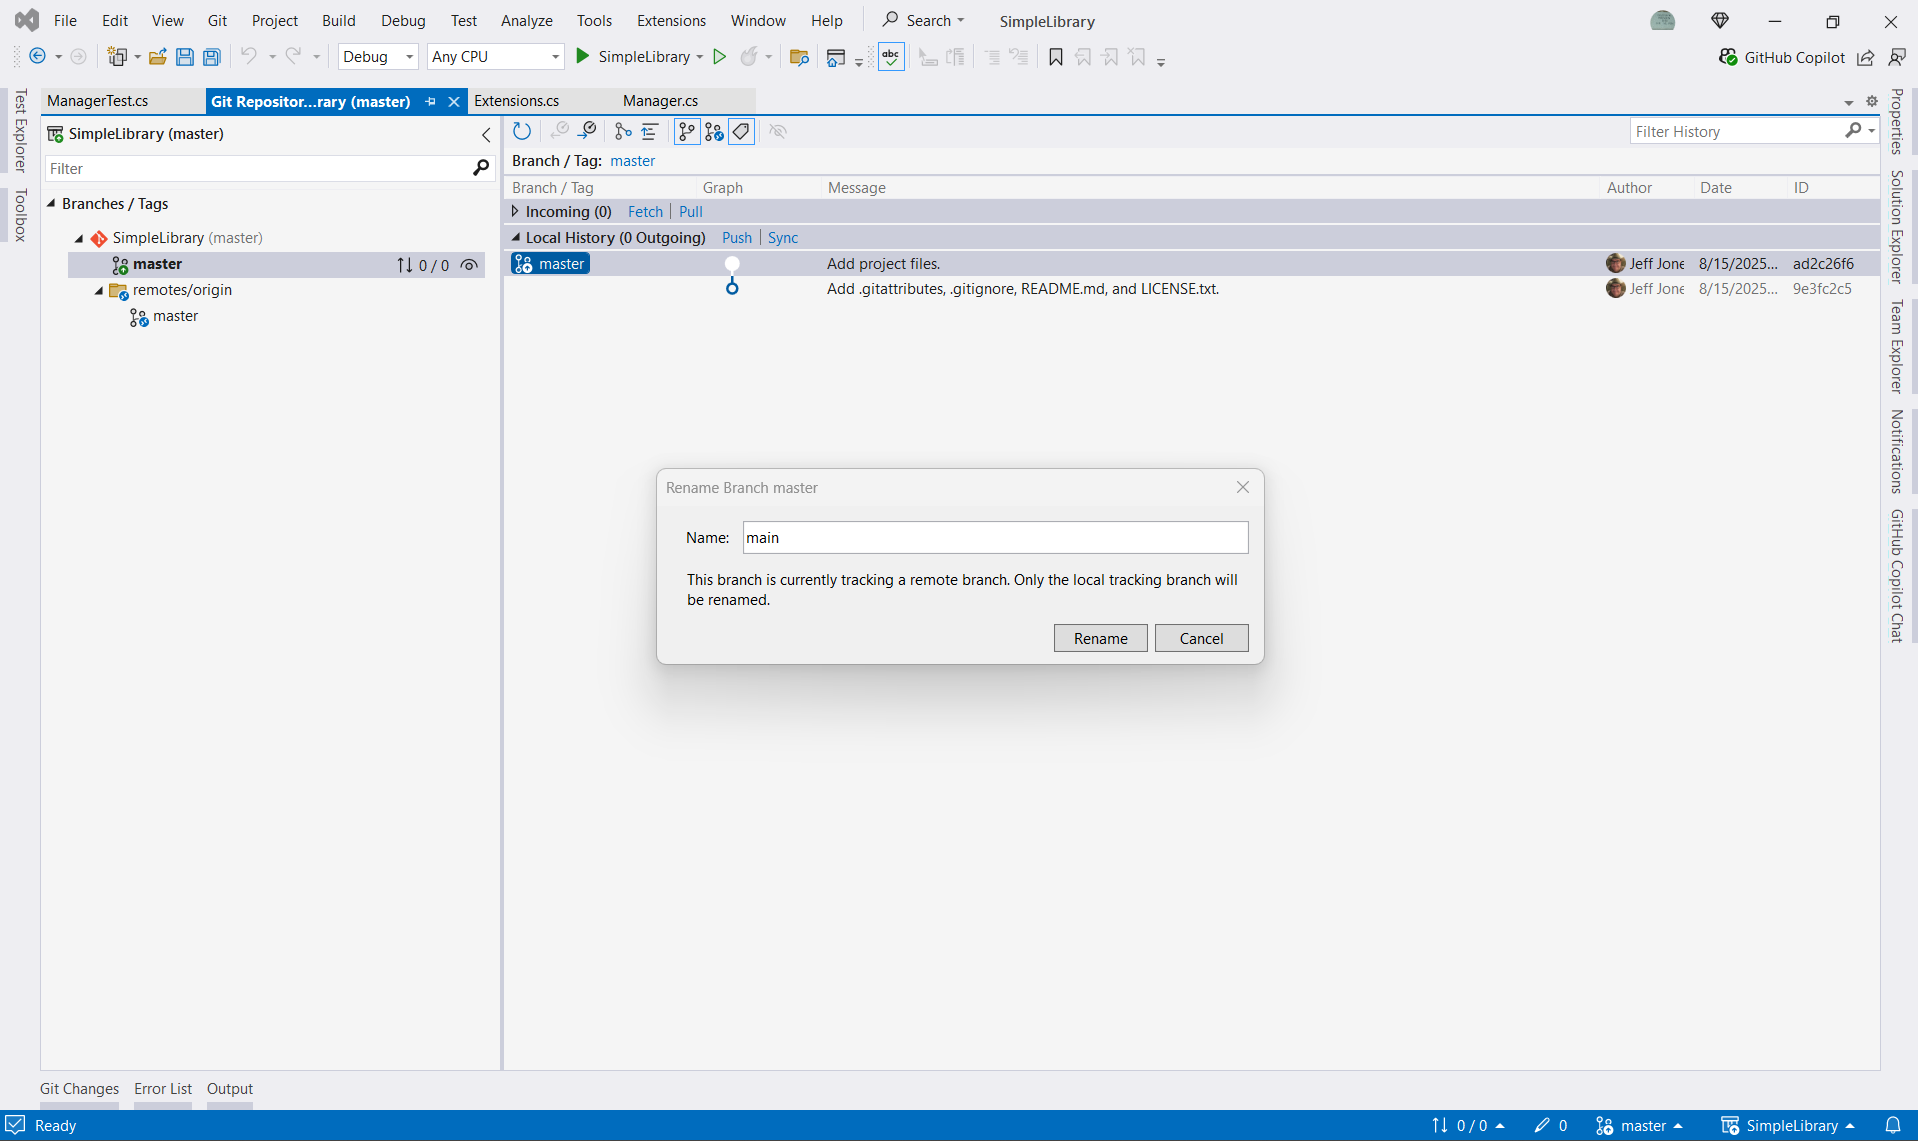
Some Git managers prefer not to use the traditional “master” name, but use something different, such as “main”. The branch can be renamed.
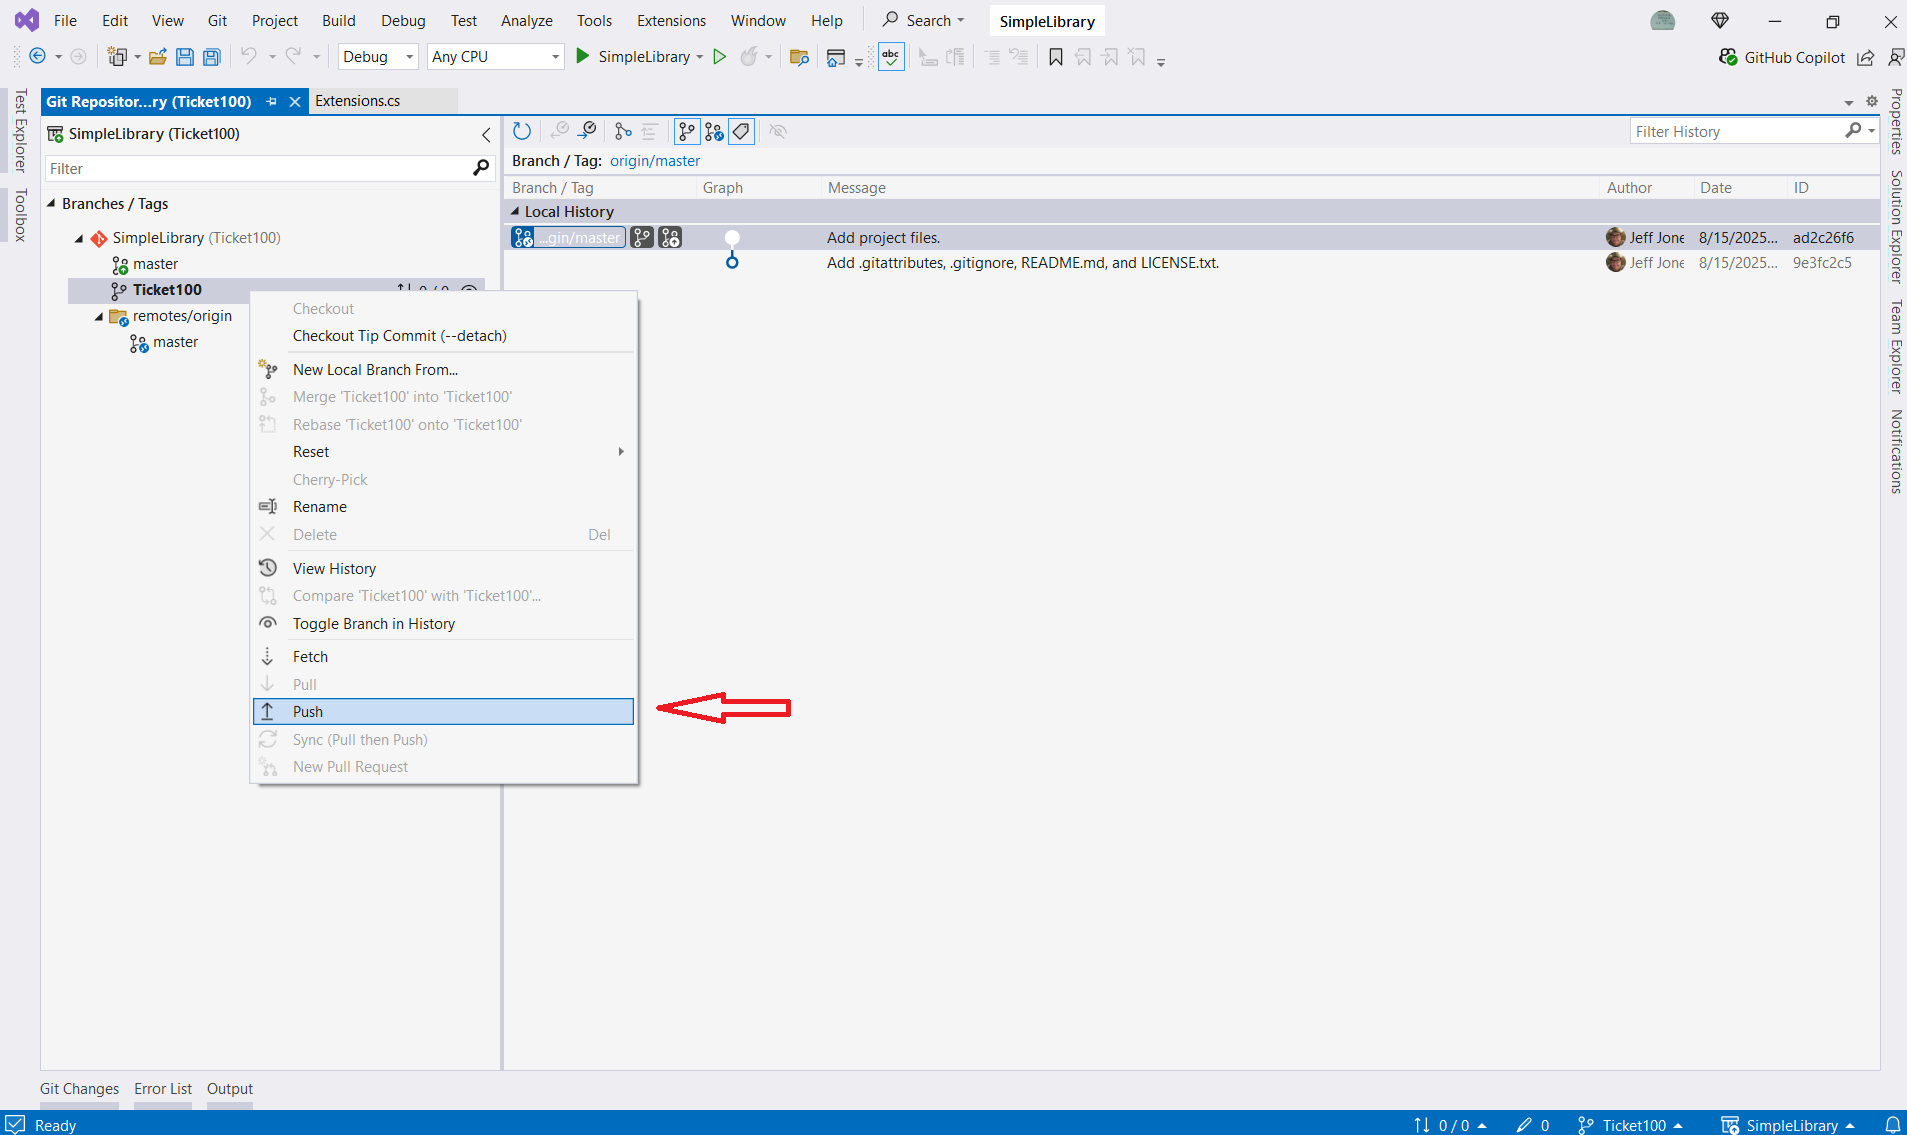
Push the local working branch to the remote branch, if not already done.
Branching Out
Now that the master branch is created locally and synchronized with the remote, in order to start development, coding should be done in working branch(es) created from the master branch (or whatever branch is designated as the last good codebase.
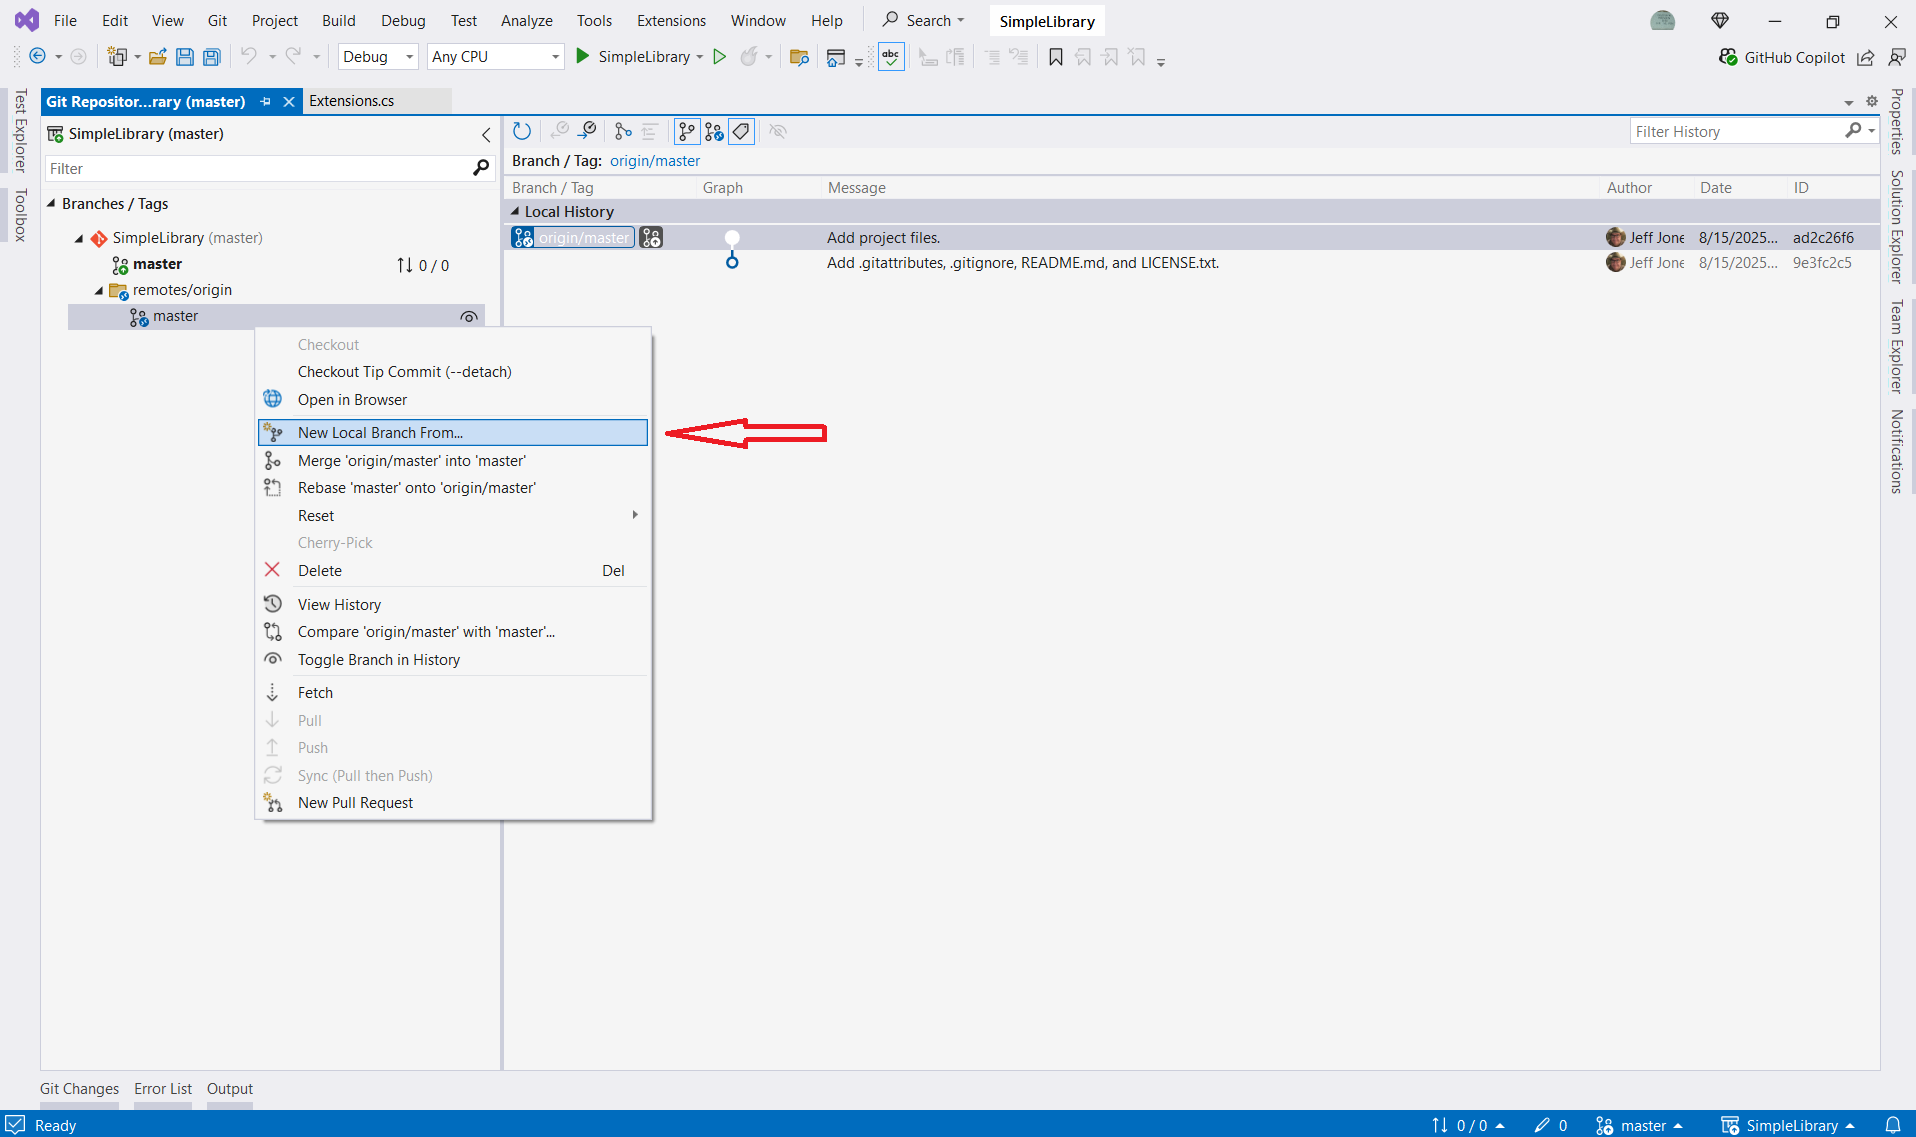
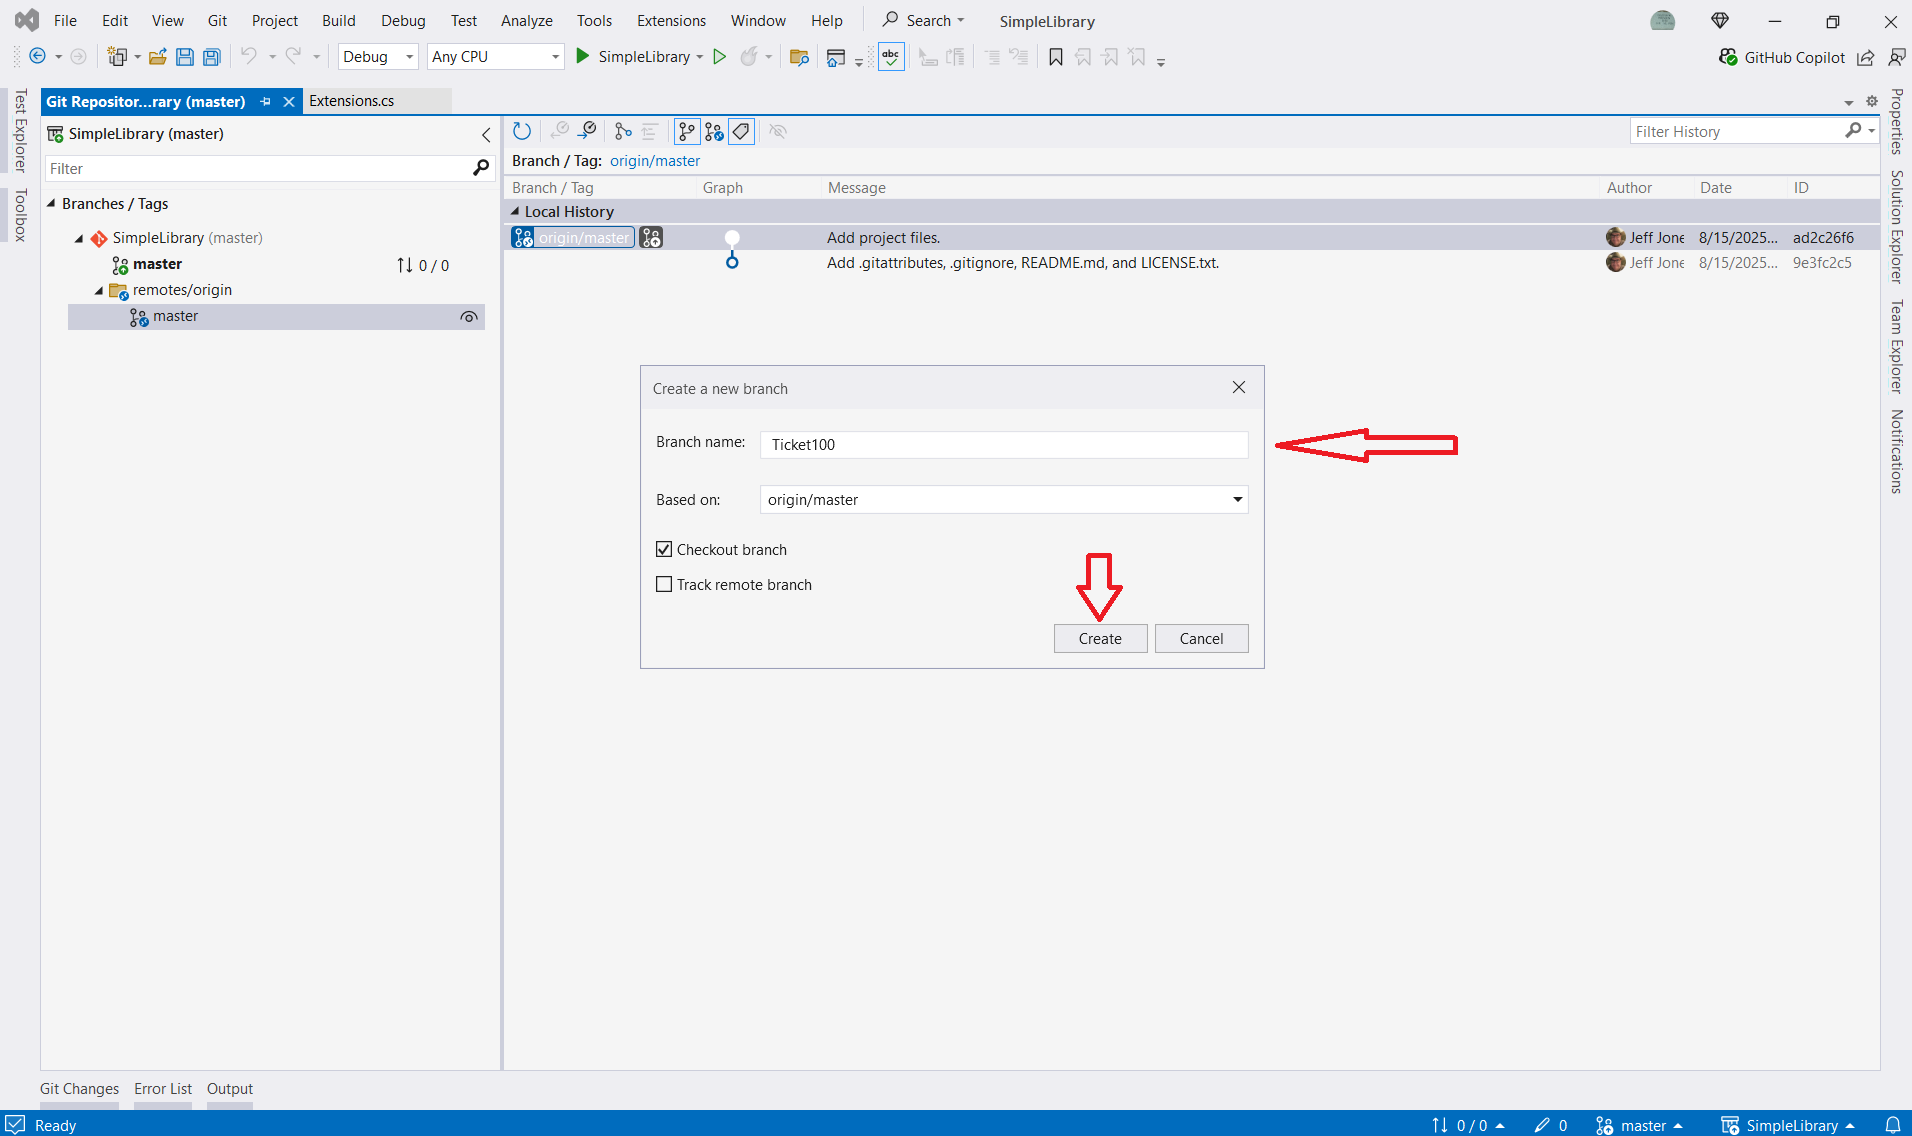
Some software shops prefer to use branch prefixes, such as “feature\”, “bug\”, etc. before the desired branch name. One good practice is to designate the case ticket used for the work, and the developer’s initials. For example, if I am working on a new feature based on ticket Ticket100, I could name the branch “feature\Ticket100_JDJ”. There are multiple ways to name working branches, but the main focus is to designate what a person viewing the branch names would need to know to understand what the branch is for. The working branch is created from whatever the original source branch is, in this case “master”.
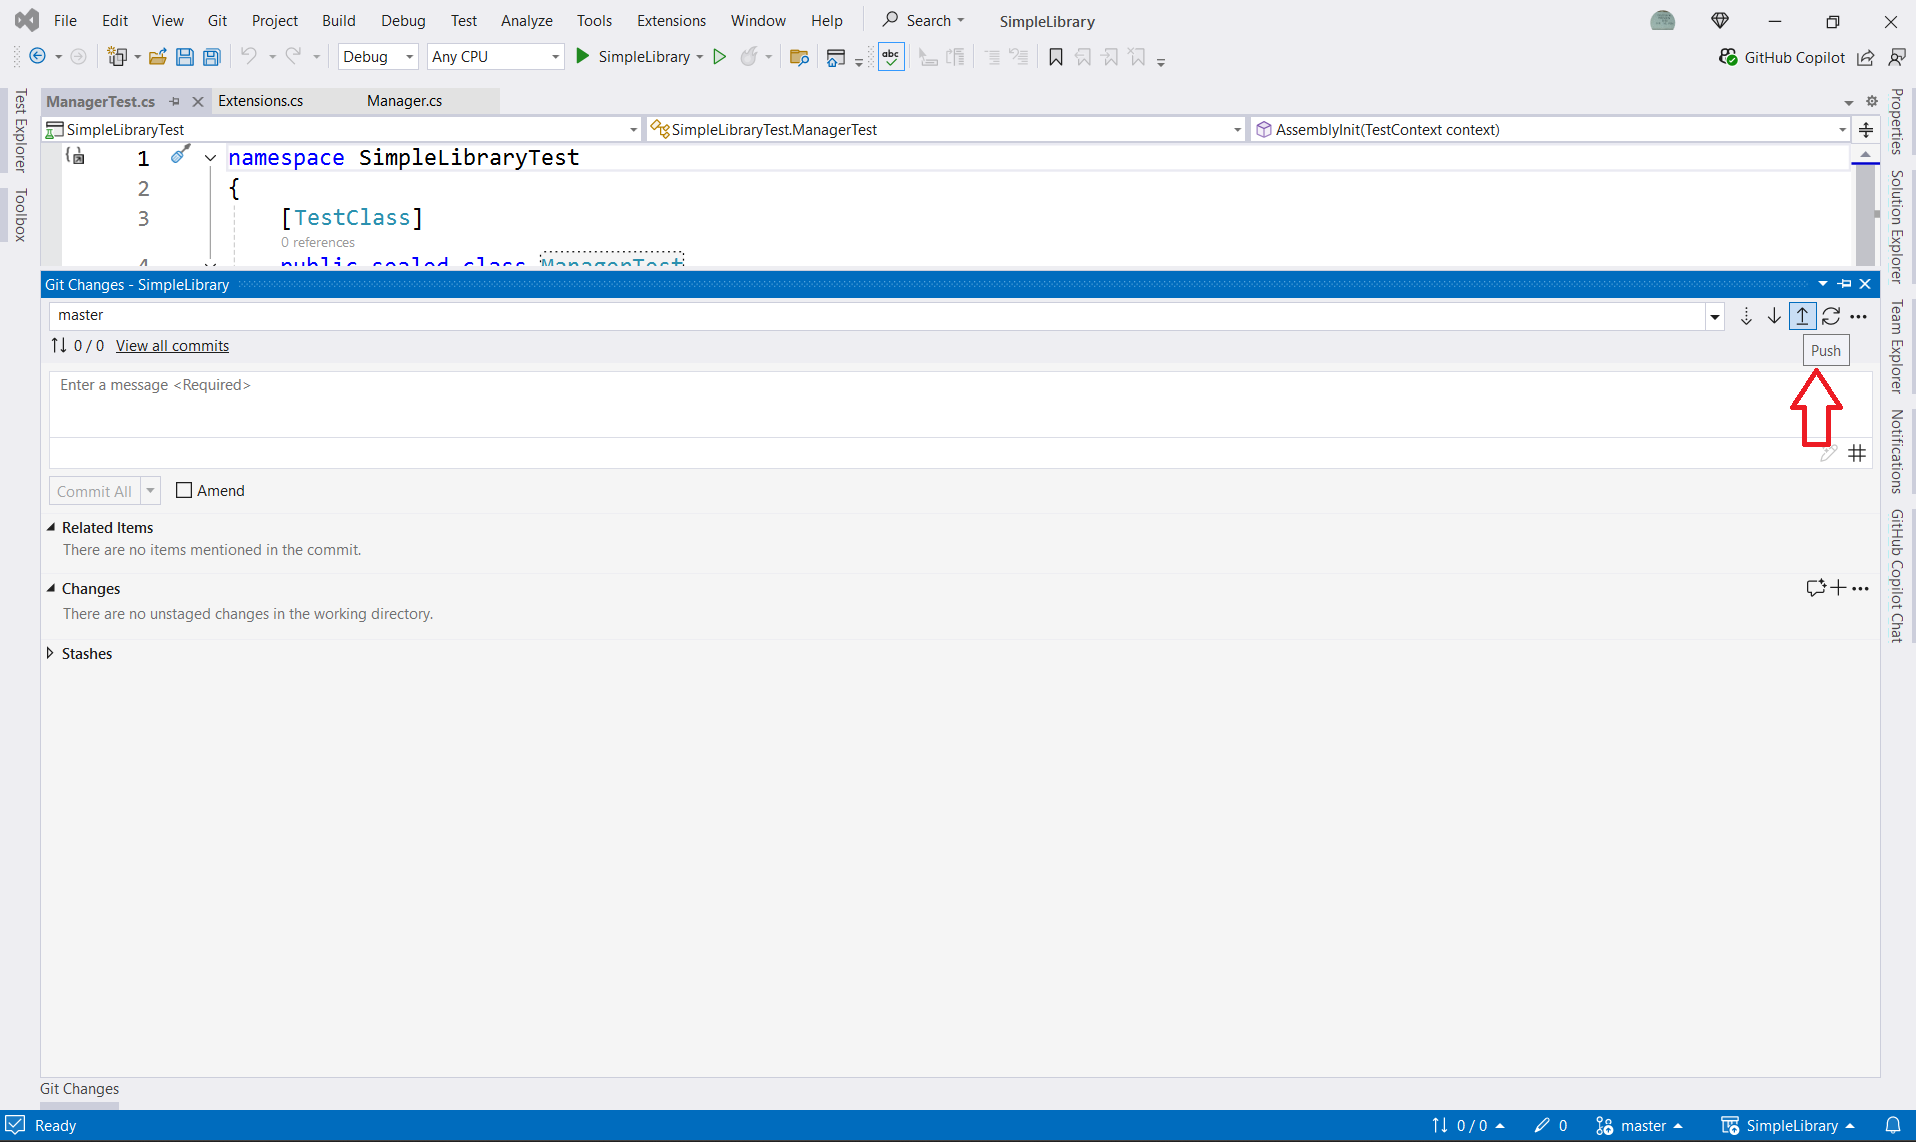
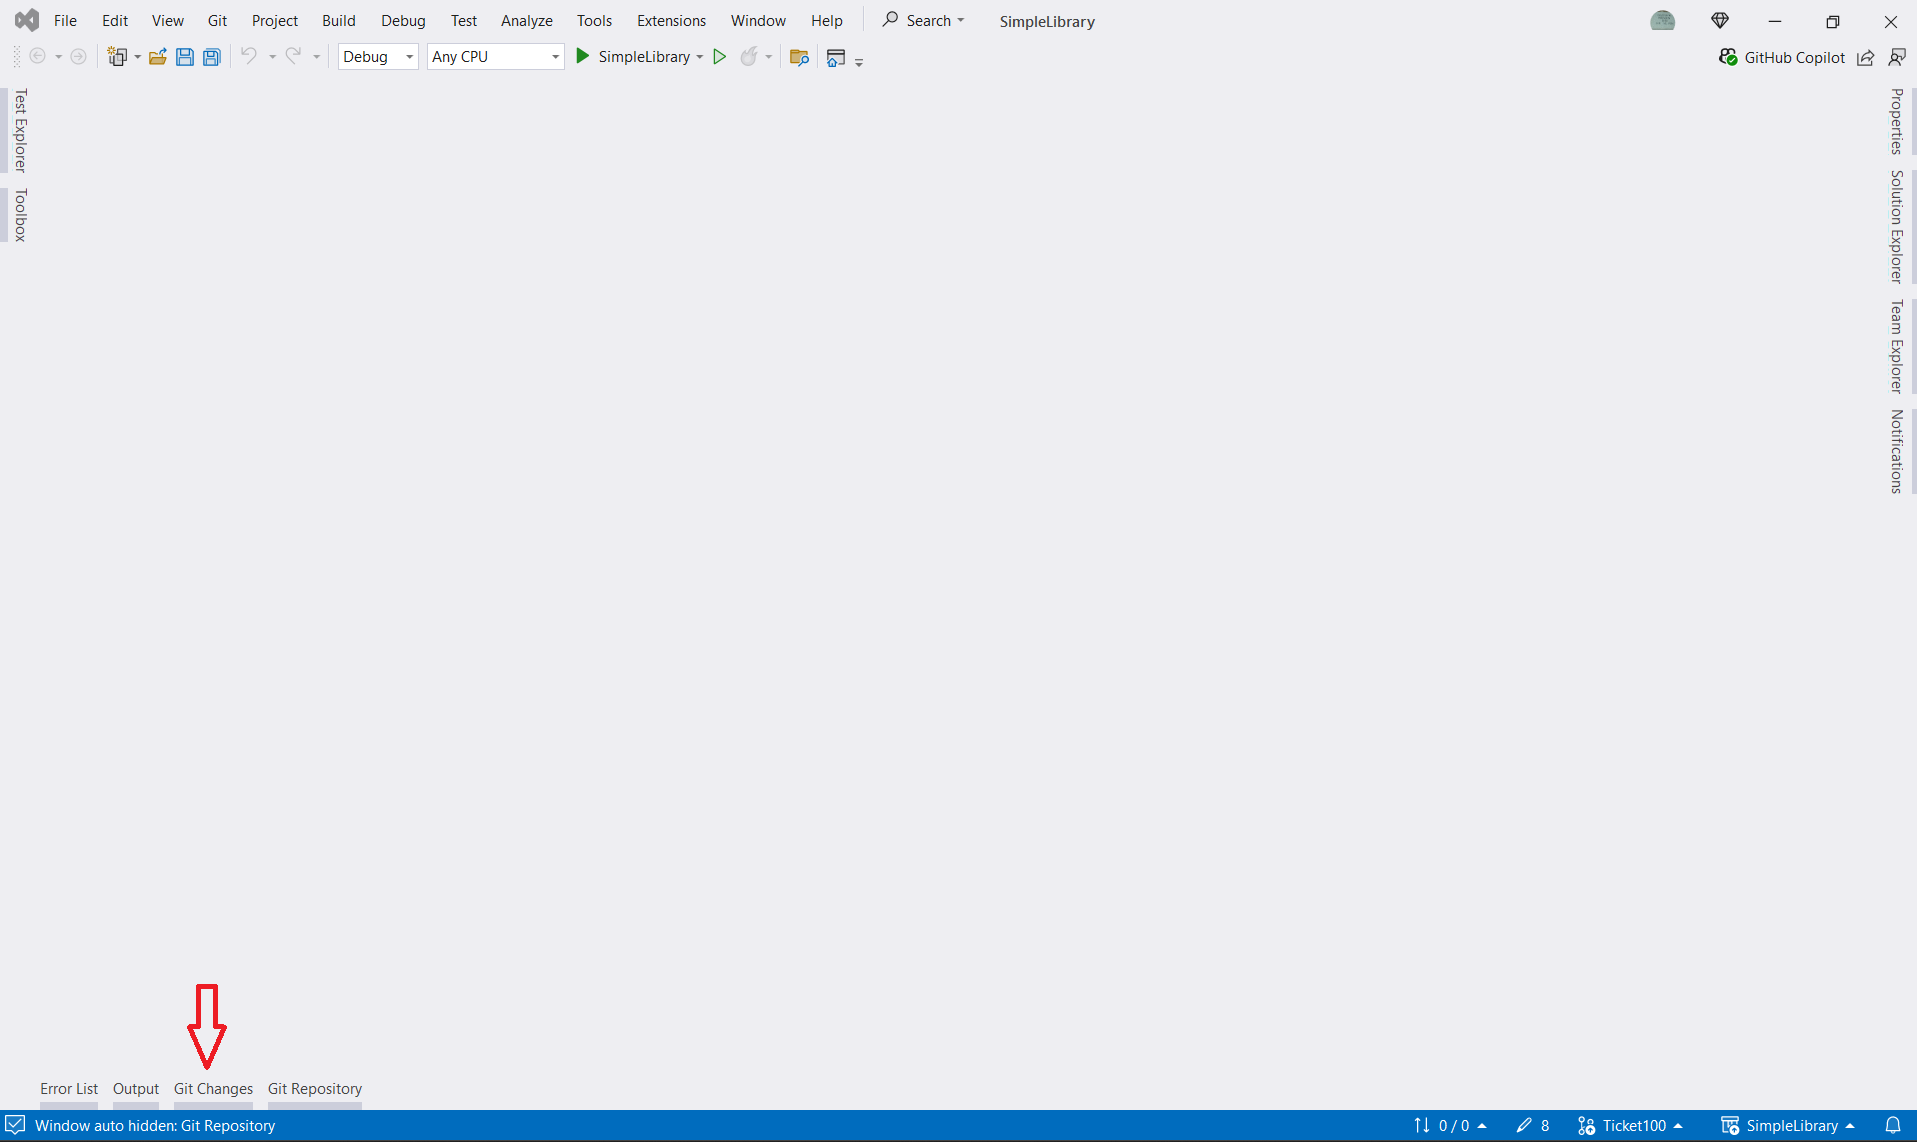
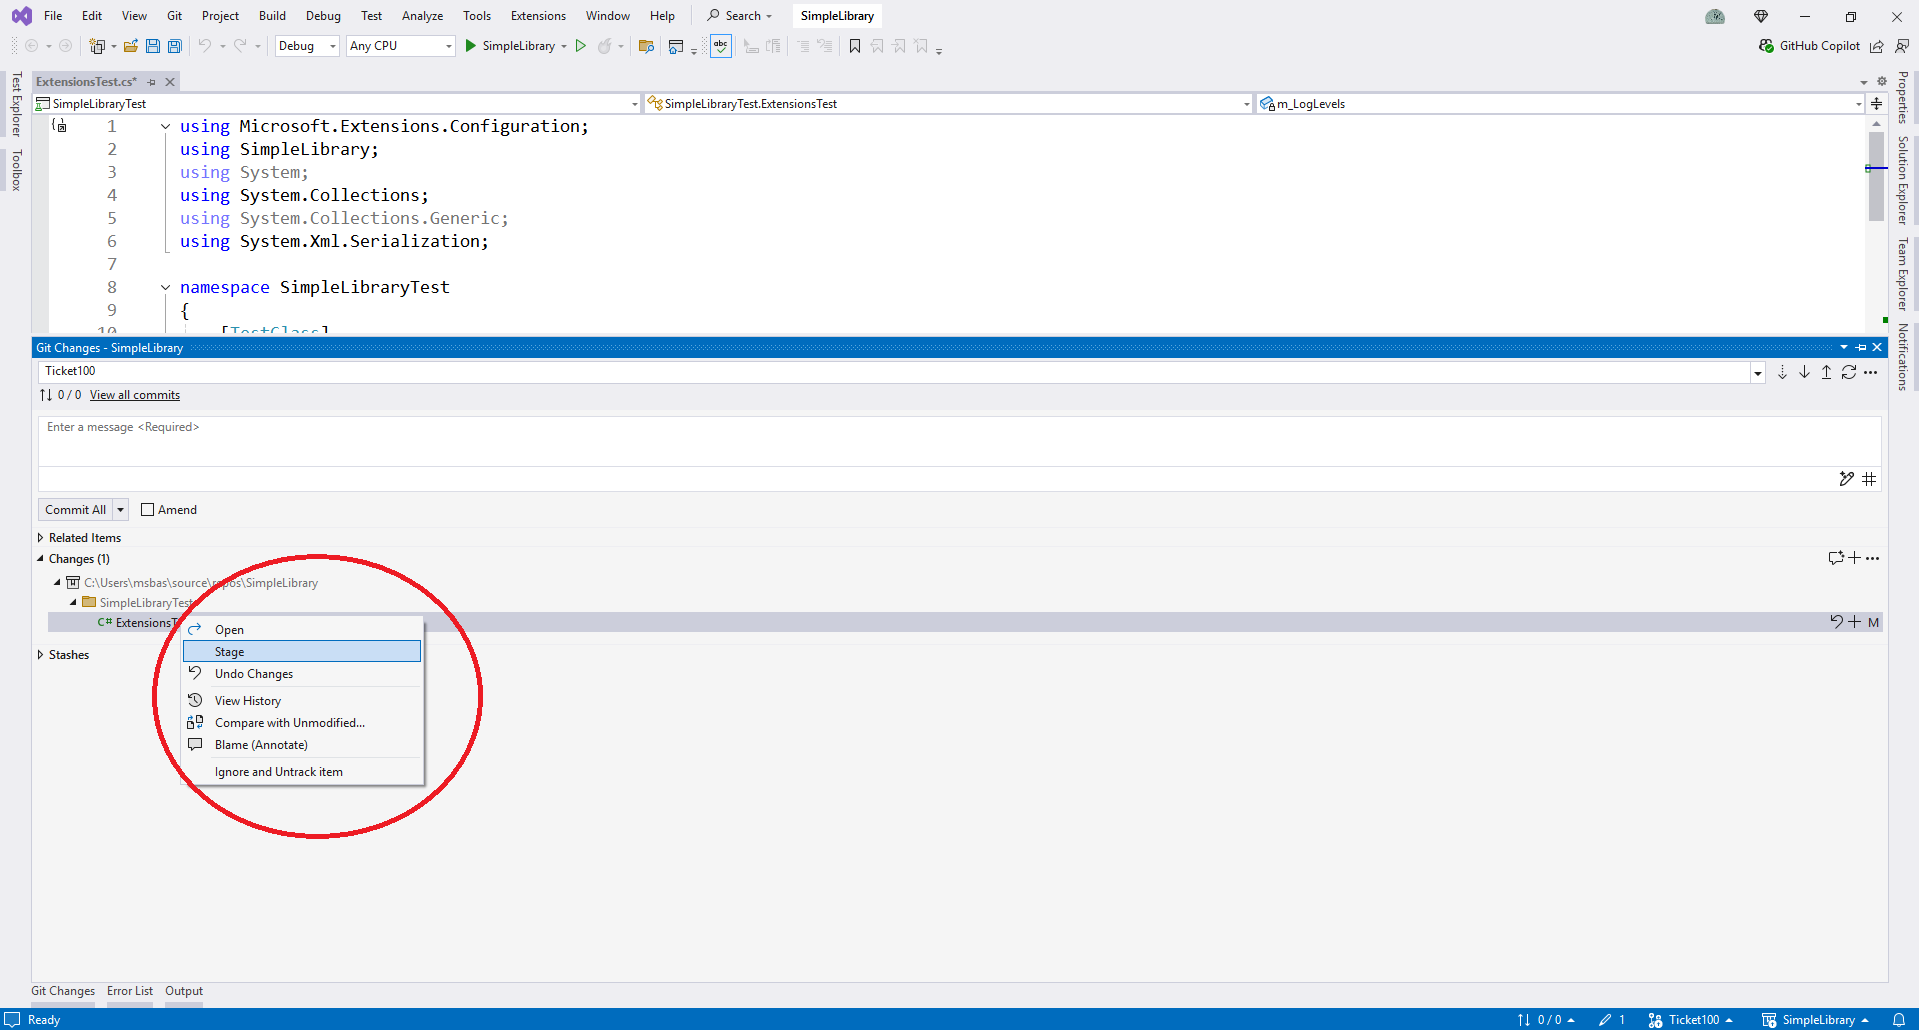
Once the coding work has completed to the point of checking in code, open the Git Changes window.
With Git, your local changed files will show here. When your work on the files is completed to some point you want to check in, changed files are Staged to the local Git branch. This window allows you to see what has changed for each file and let you either stage the file(s) or undo changes.
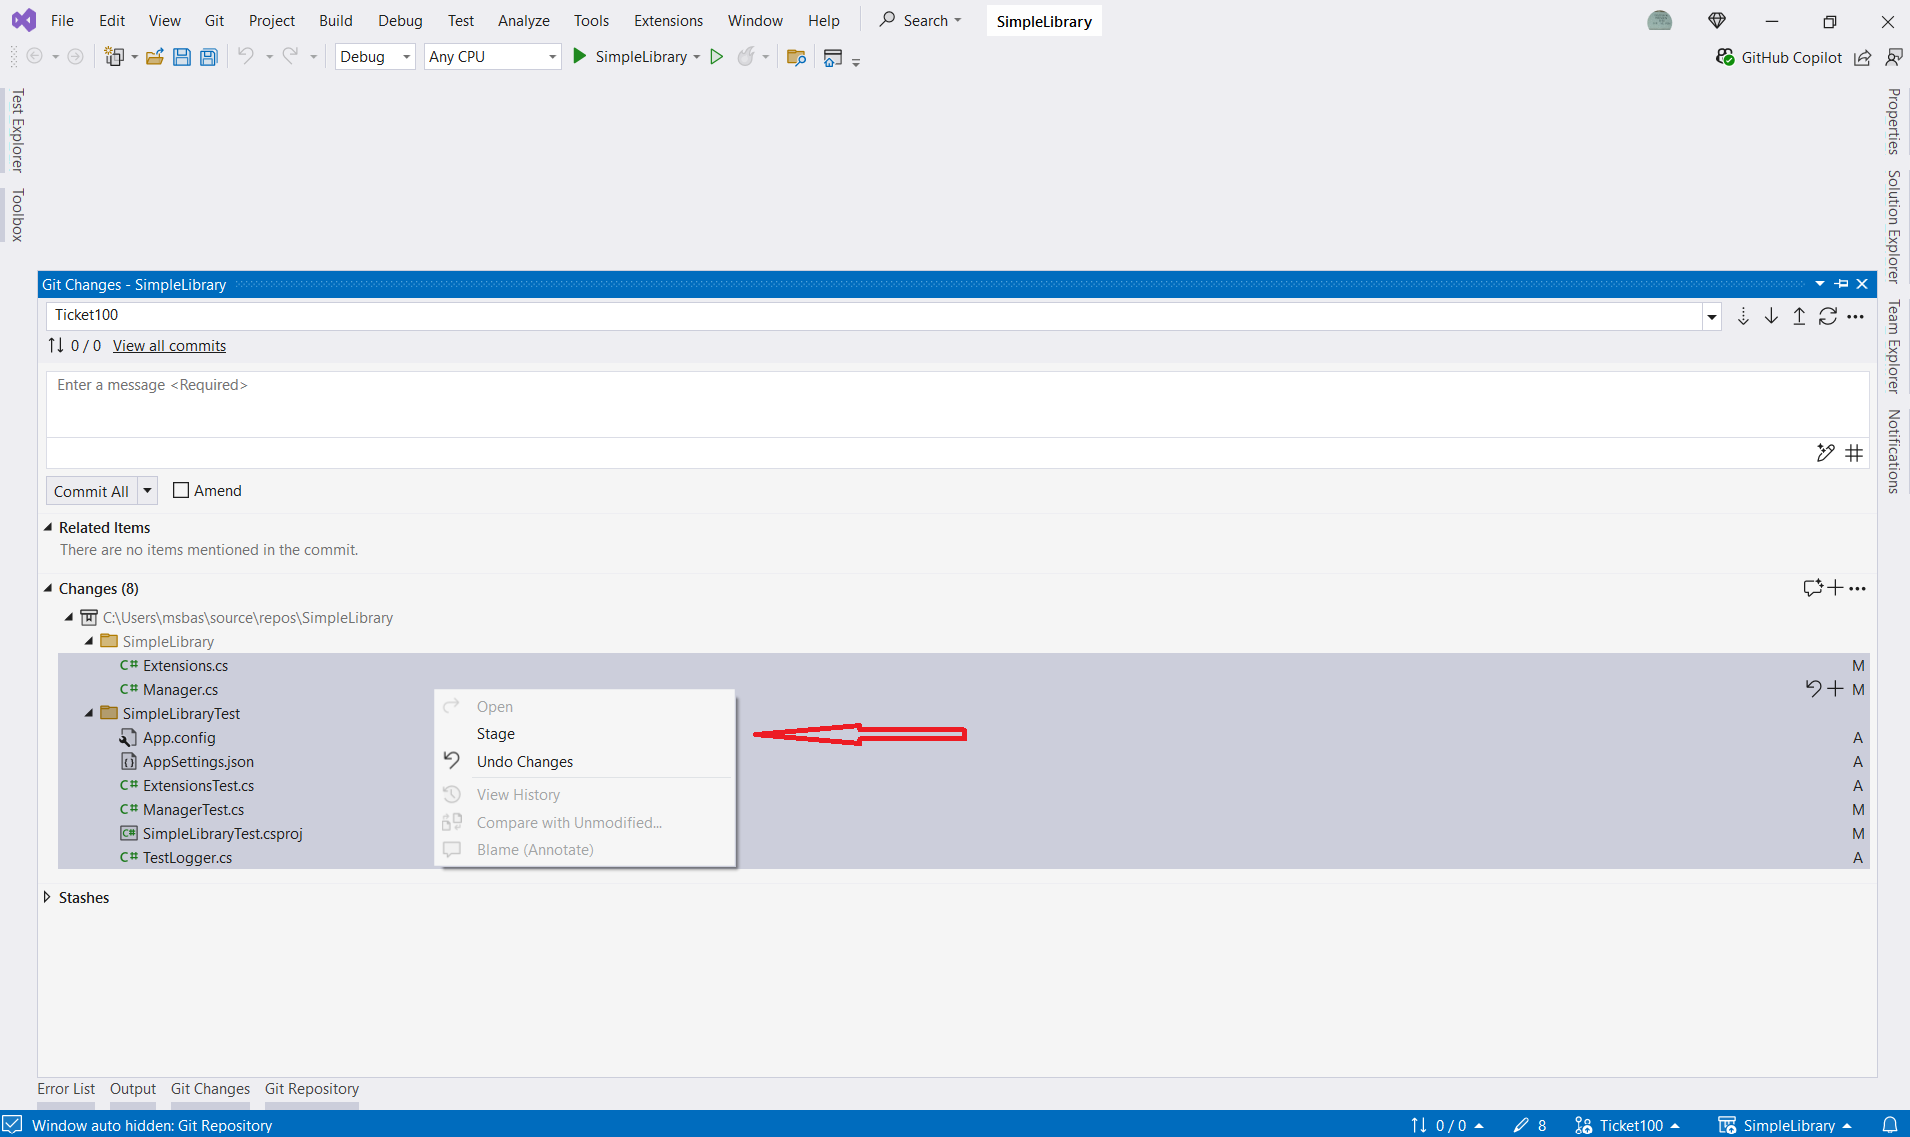
Once staged, the files show un the Staged block. At this point they are ready for a commit to the local Git branch.

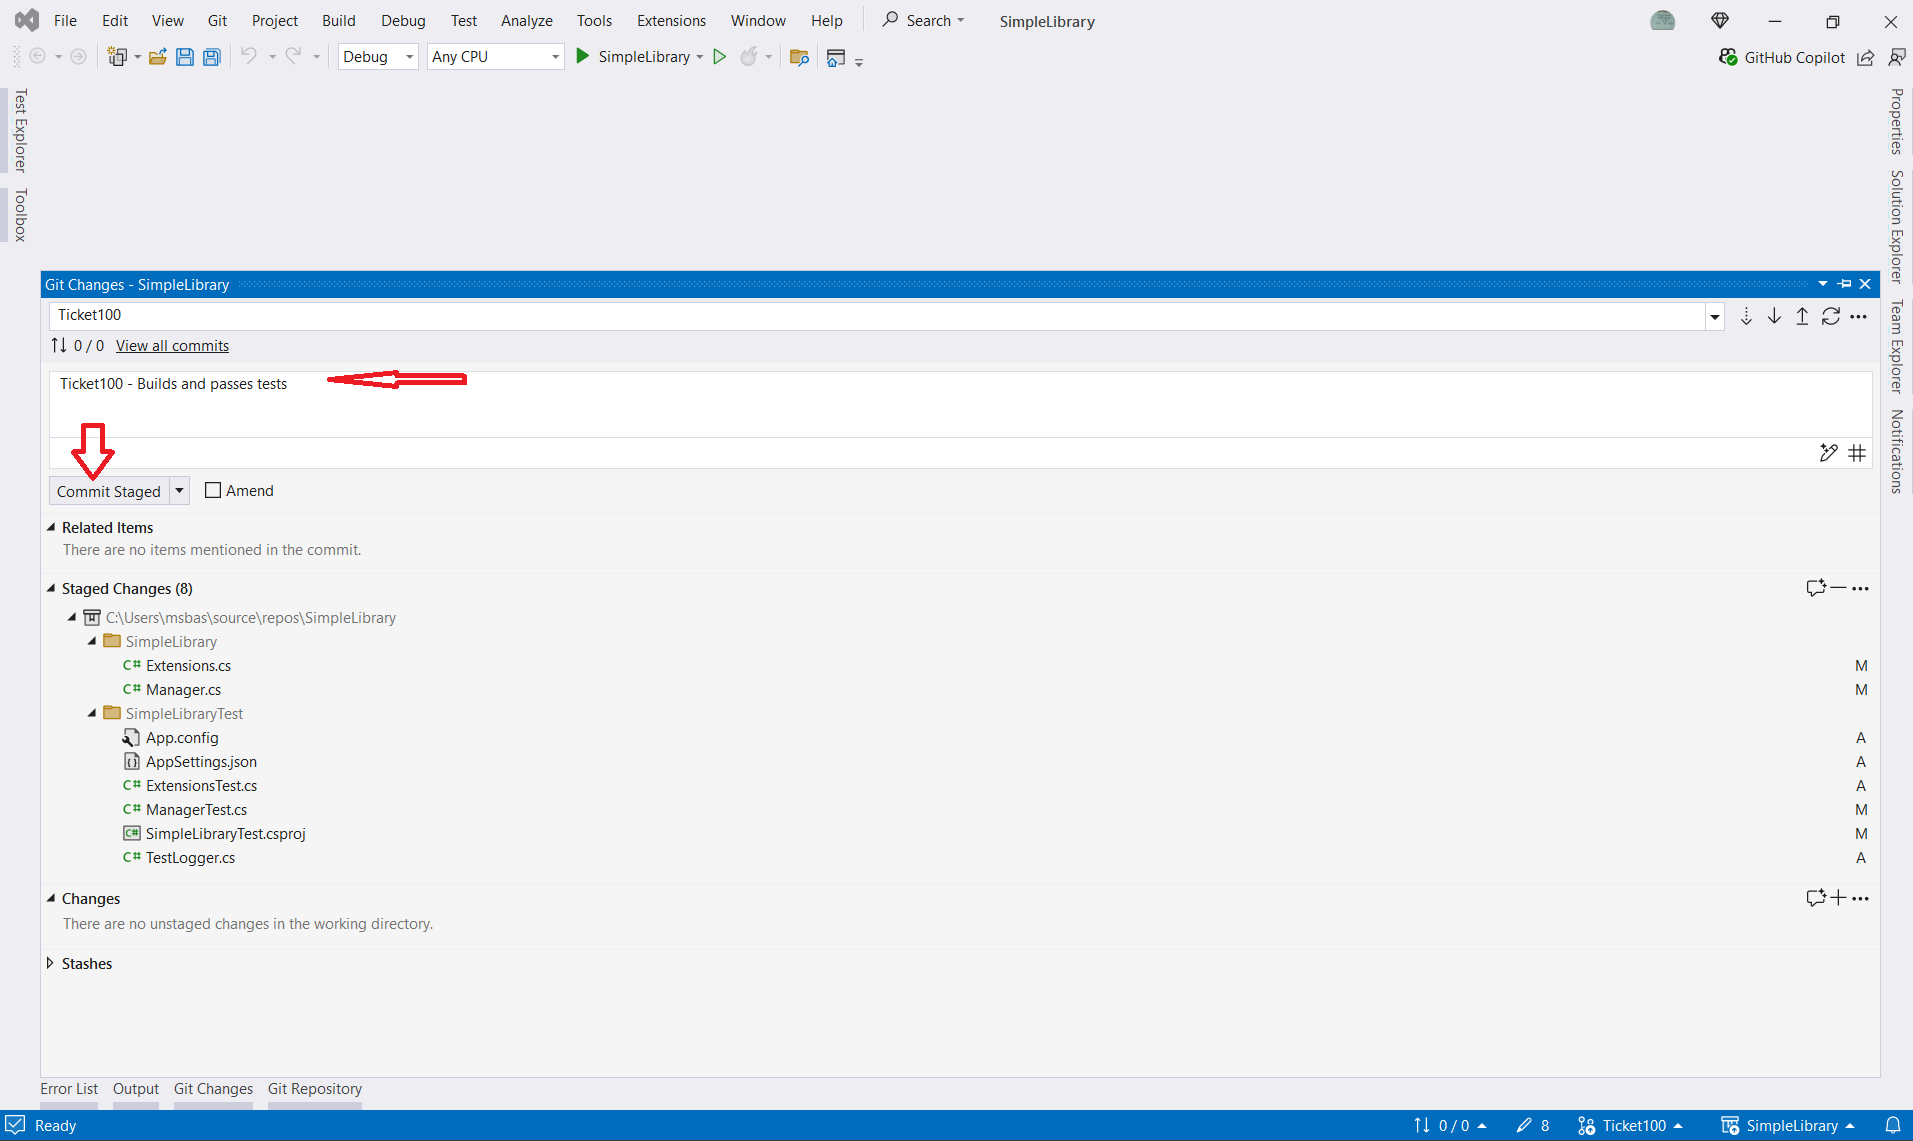
You can commit the staged files and add comments. With some ticketing systems, adding the case number for a ticket will update the ticket, also, that you committed the changes locally. The window will denote that the commit was made (showng a commit ID number), or if it was not.
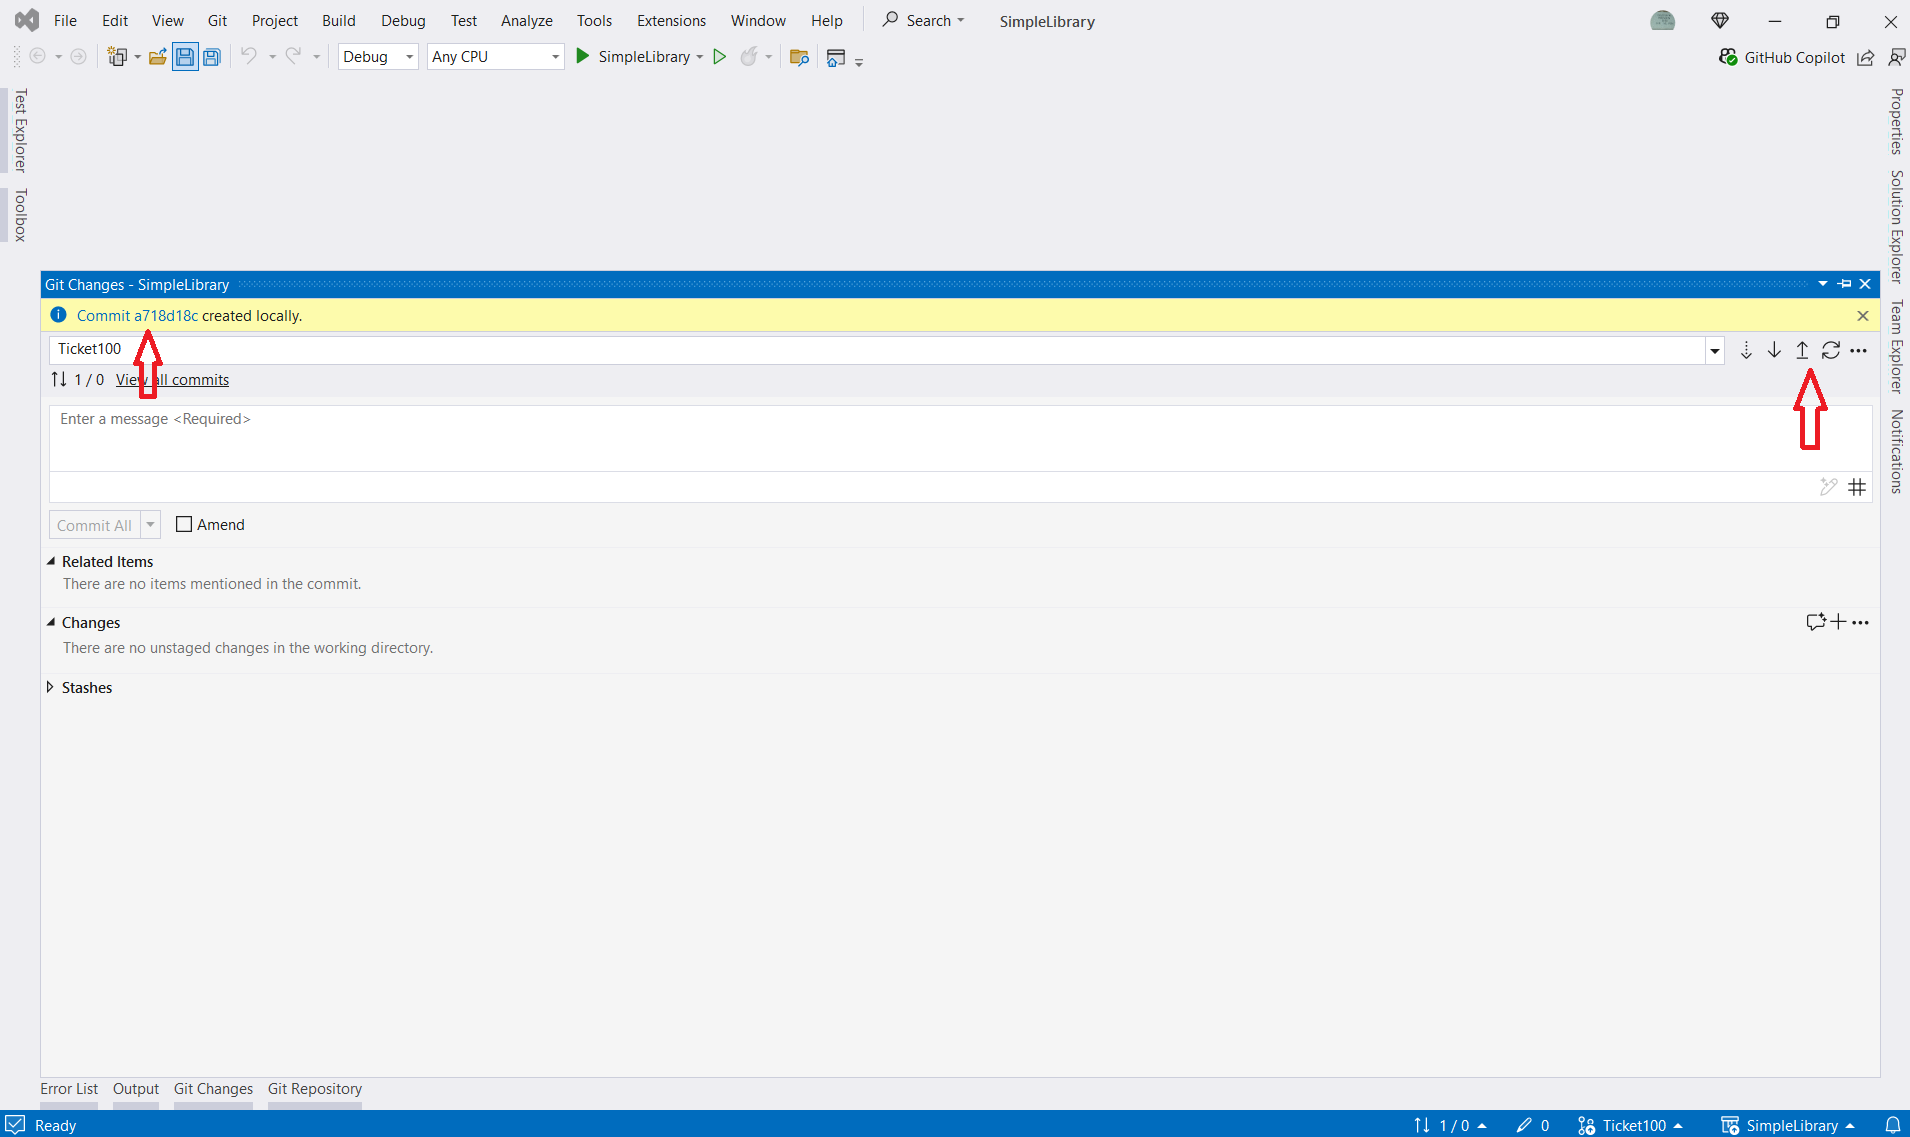
Your changes have not yet been committed to the remote repository branch (push). If it is time to do so, clicking on the arrow (to the right in the picture above) will do so, using the same title and description from your local commit.
If, at this point, you want to create a Pull Request so that the work you did can be merged into the main branch, you can create a Pull Request as shown in the image above.
Here, you can review the changes in each file, if desired. You then give the Pull Request (PR) a title and an optional (but recommended) description. Although you can add reviewers here, it is sometimes easier to add them once you open the web UI for the PR after it is created.
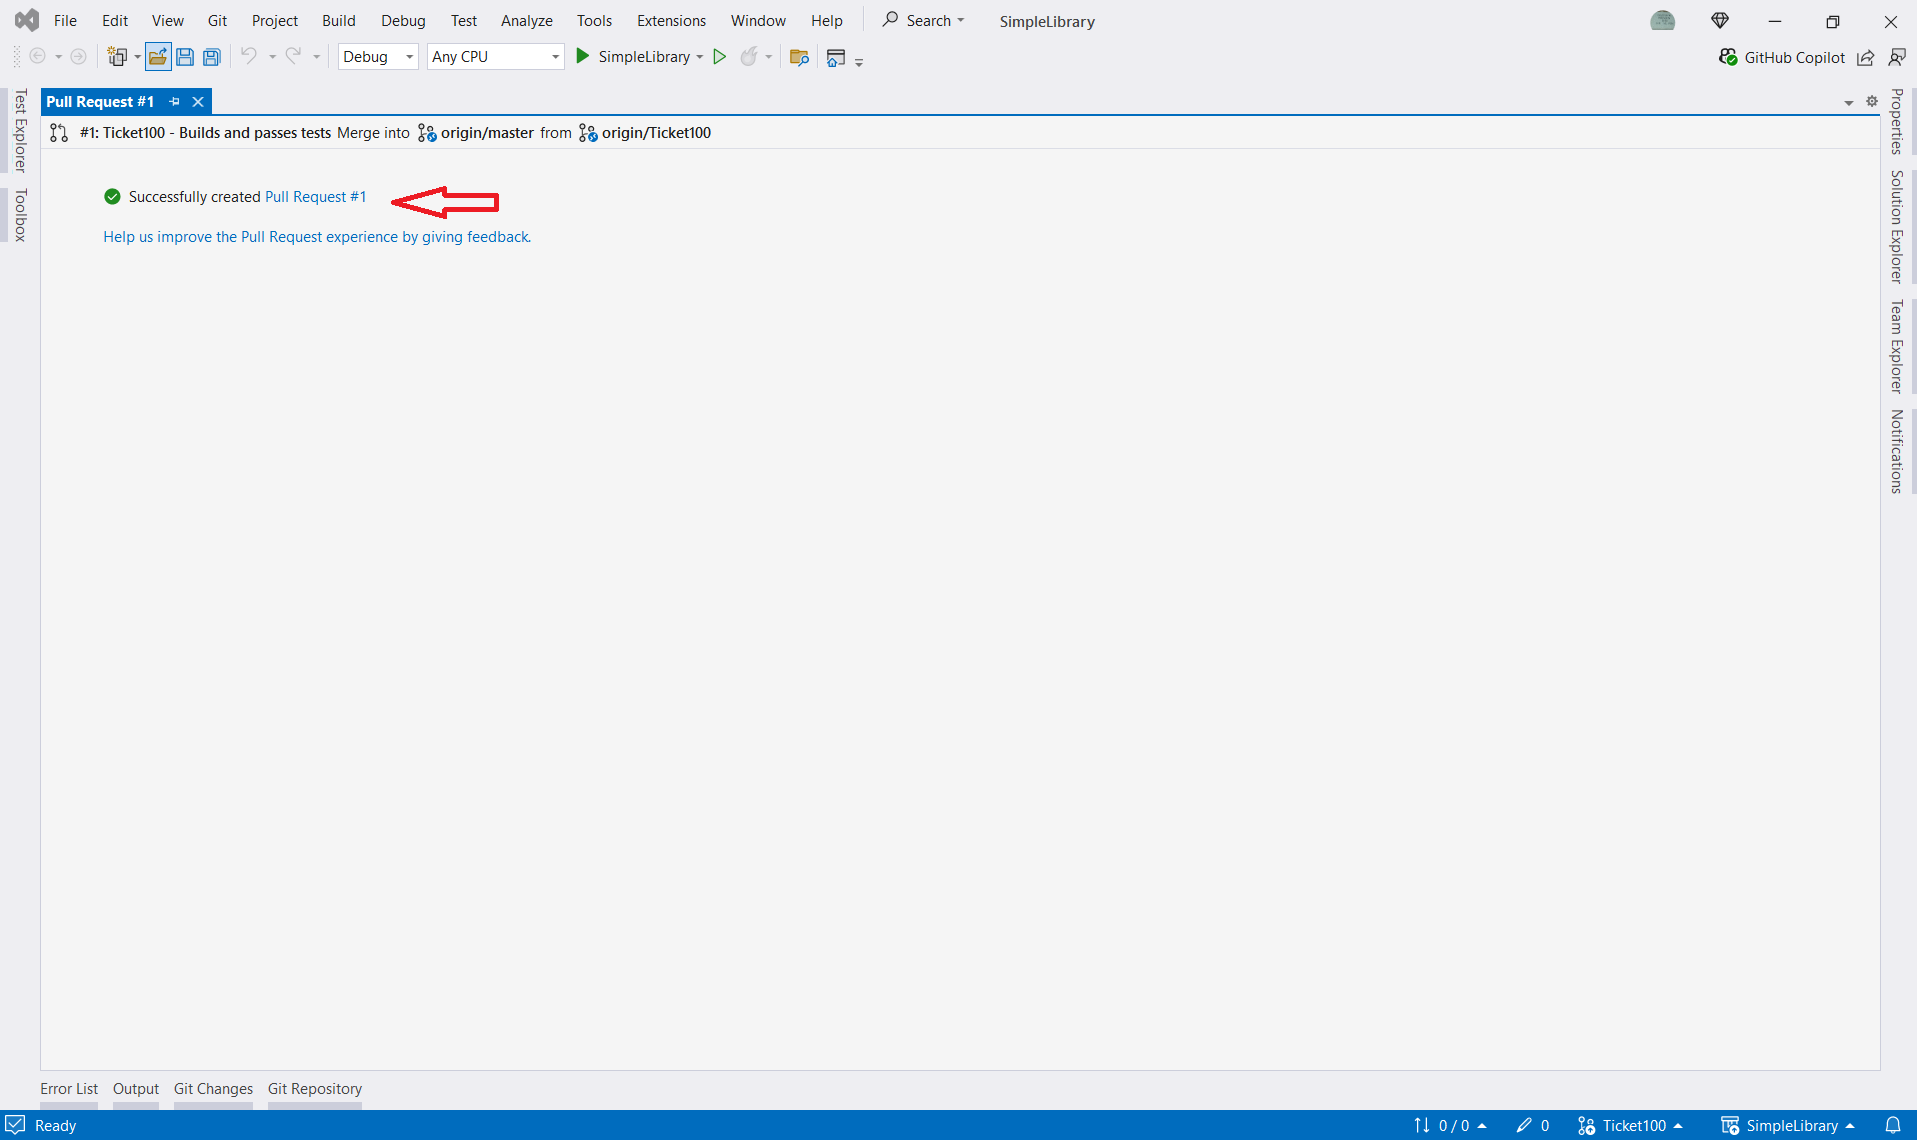
The above image shows a PR was created, and provides a link to open the web UI for the PR. In the web UI, you can add assignees, reviewers, comments, etc.
At this point, you have a PR to be reviewed, and accepted, commented on, or rejected, depending on what rules you use for merging PRs.
Maintenance
I recommend a process for developers that minimizes merge conflicts and helps team members not step on each others’ code.
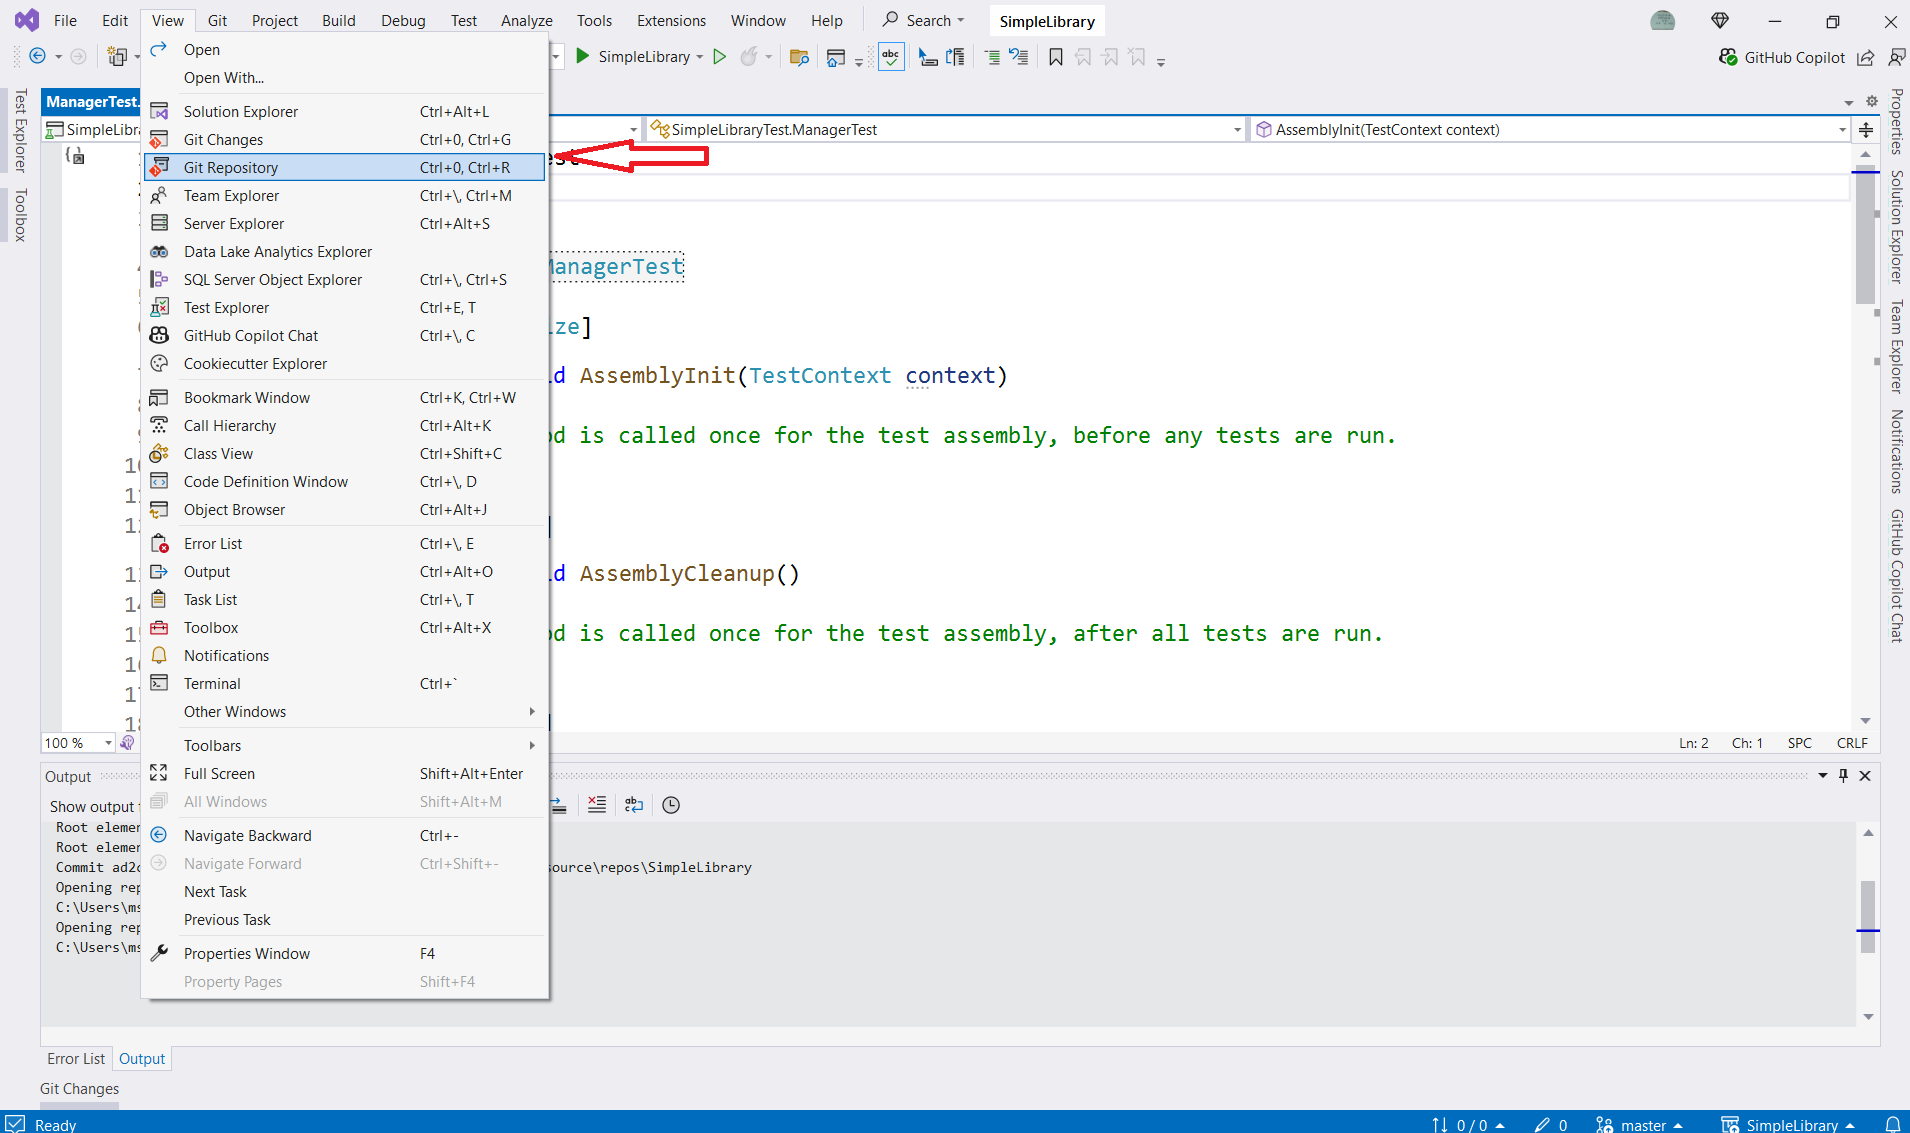
When you first open your solution to work on, open the Git Repository window, and make sure you have the latest.
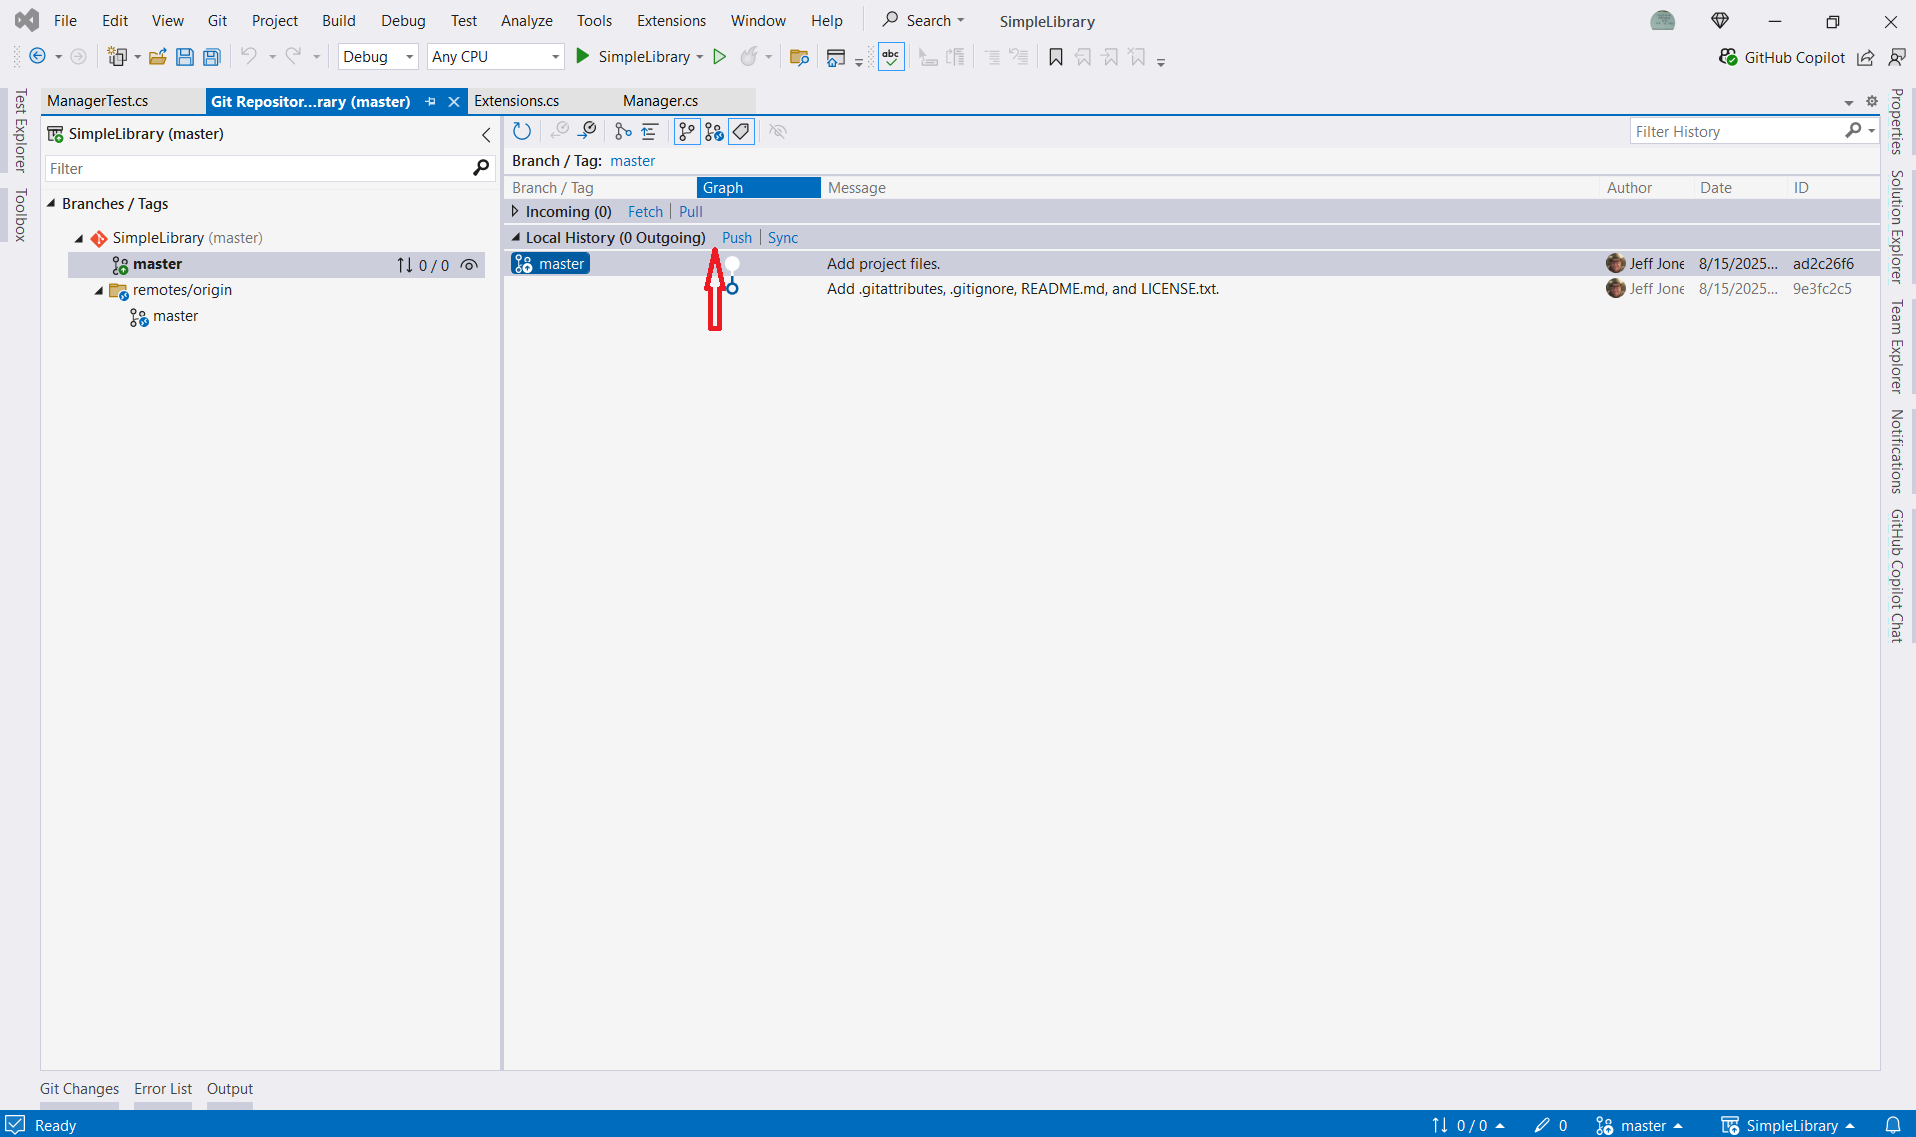
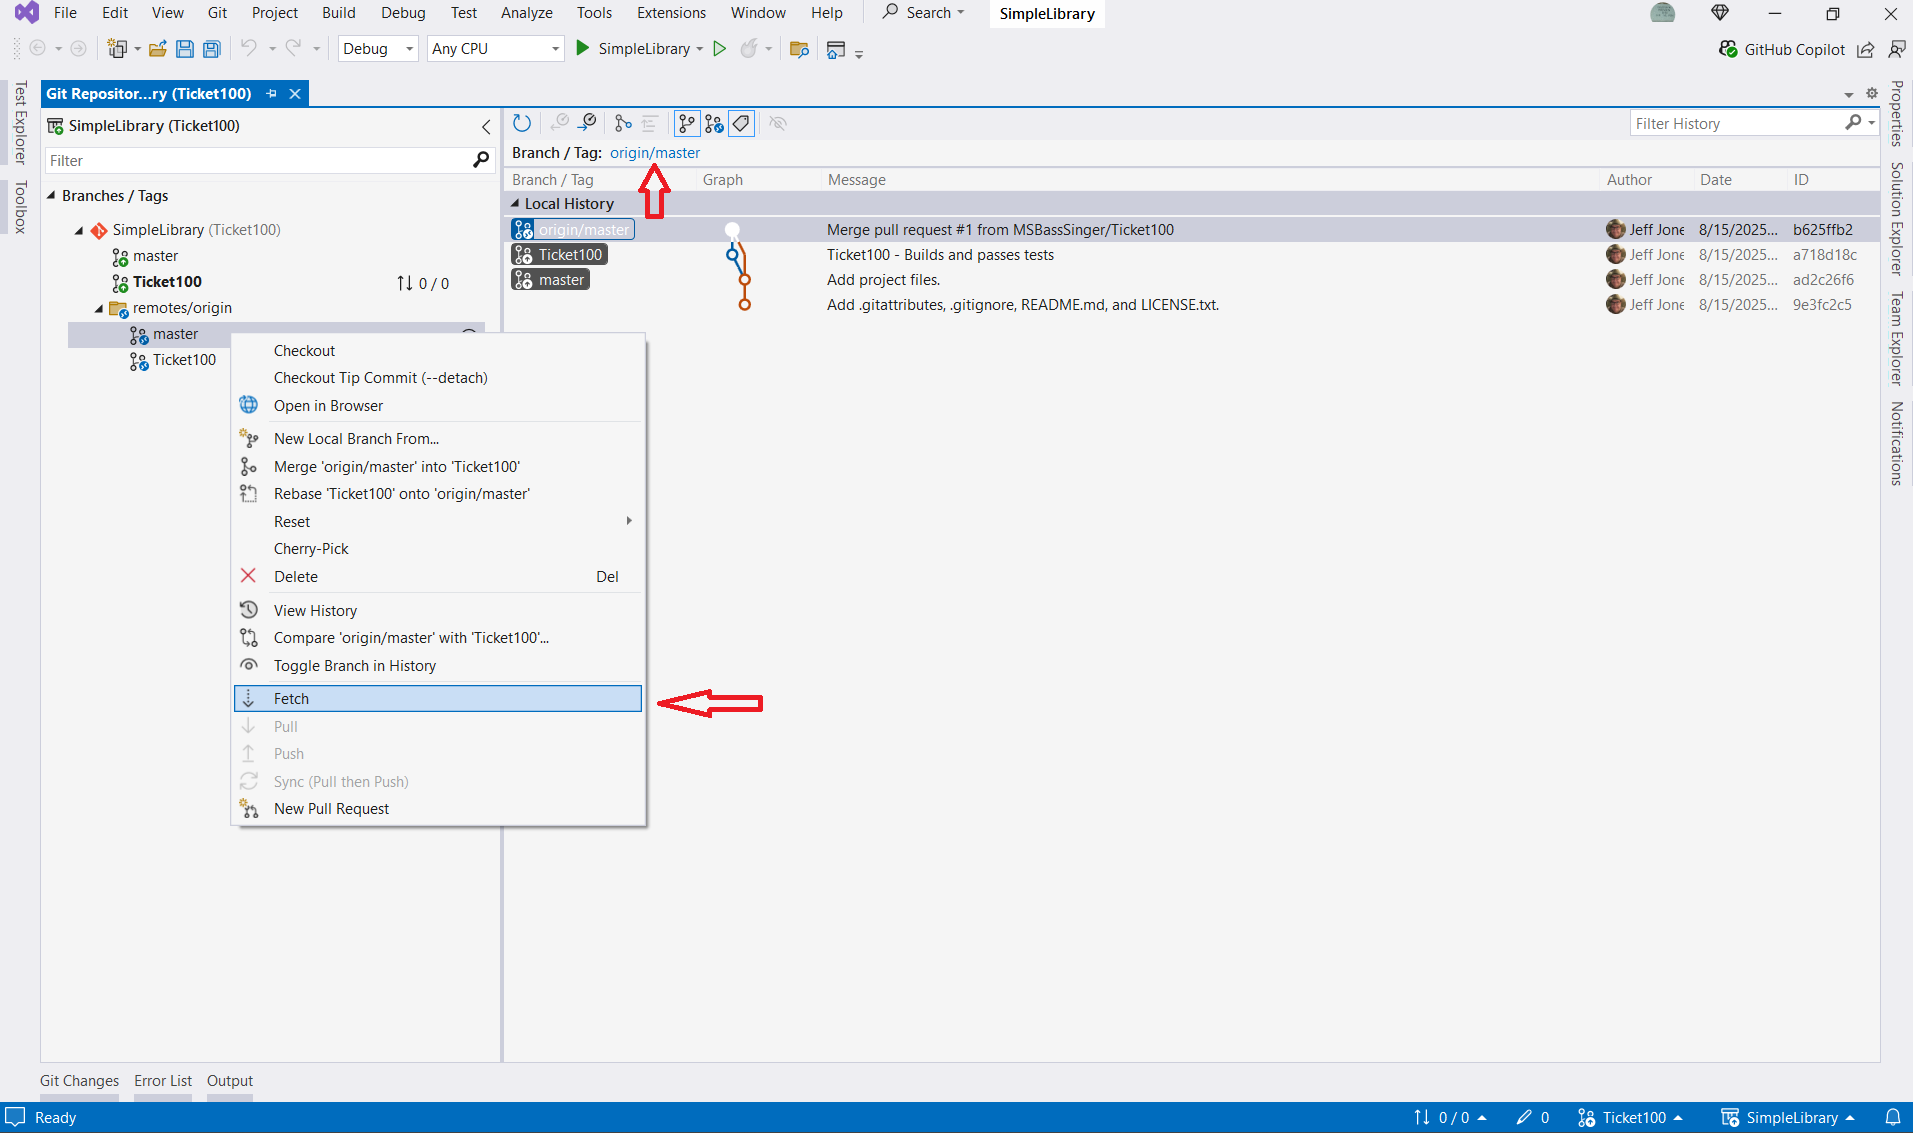
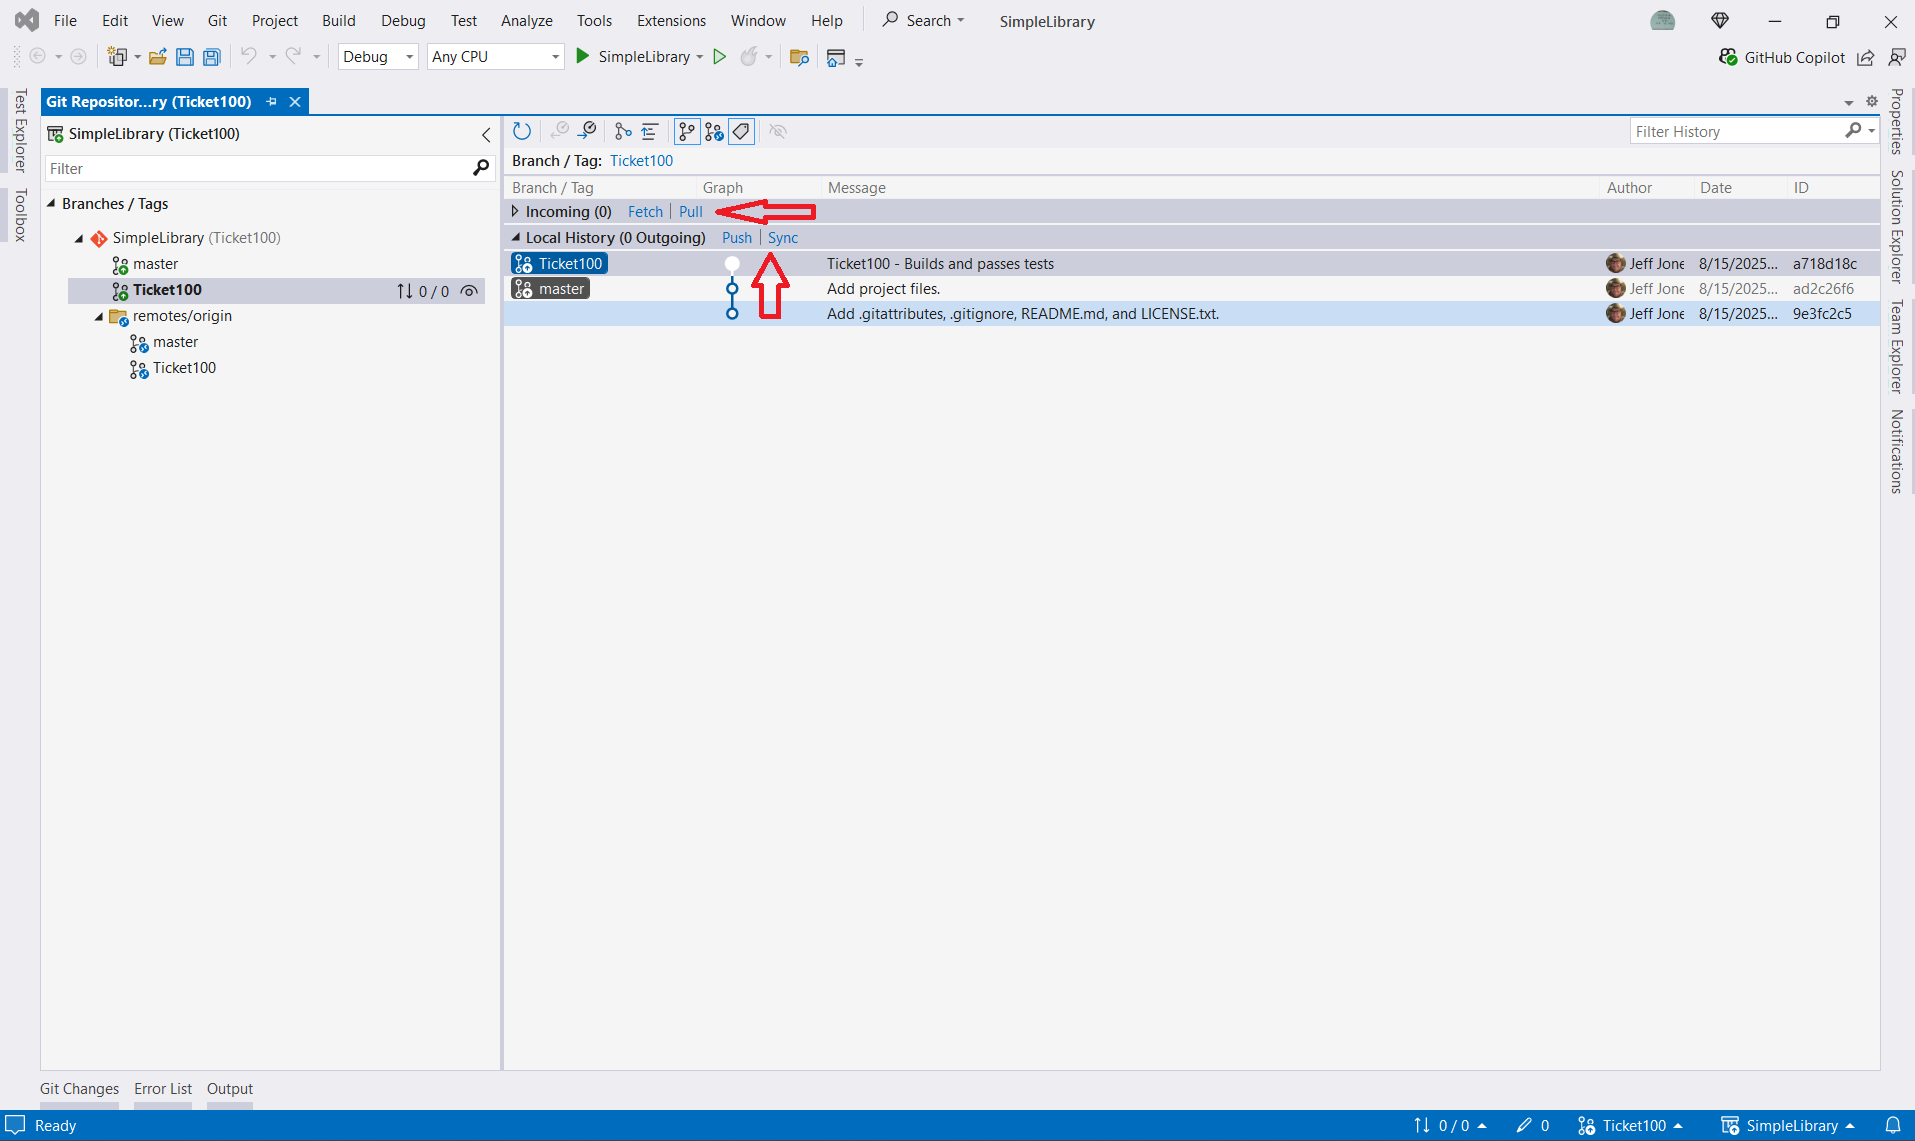
First, make sure you have the latest from your working branch. If you are the only one using that working branch, you won’t see anything remotely but what you pushed up. But it is not normal operations that cause unexpected problems - it is abnormal operations you did not expect. So fetch from the remote working branch as shown below, so you can pull or fetch the latest.
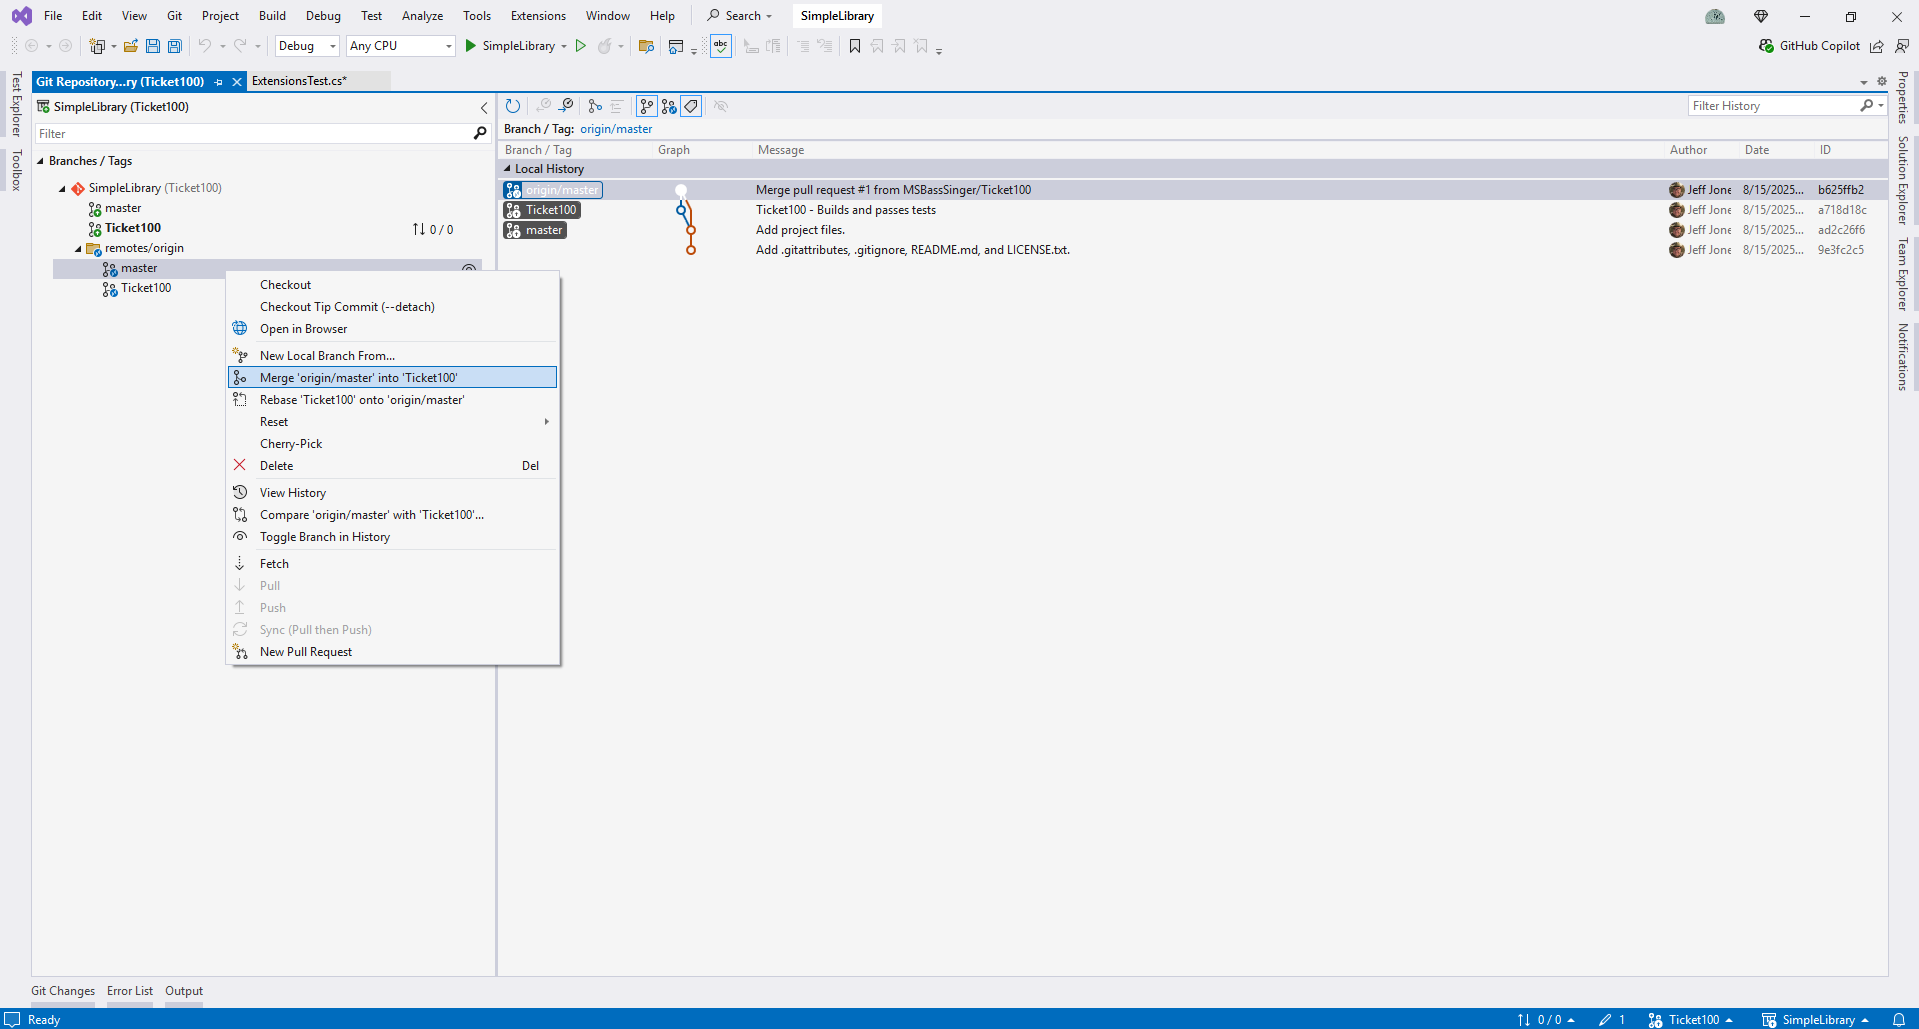
Second, make sure your Git Repository window is pointing to the latest commit in the main branch by fetching the main branch that the working branch originated from.
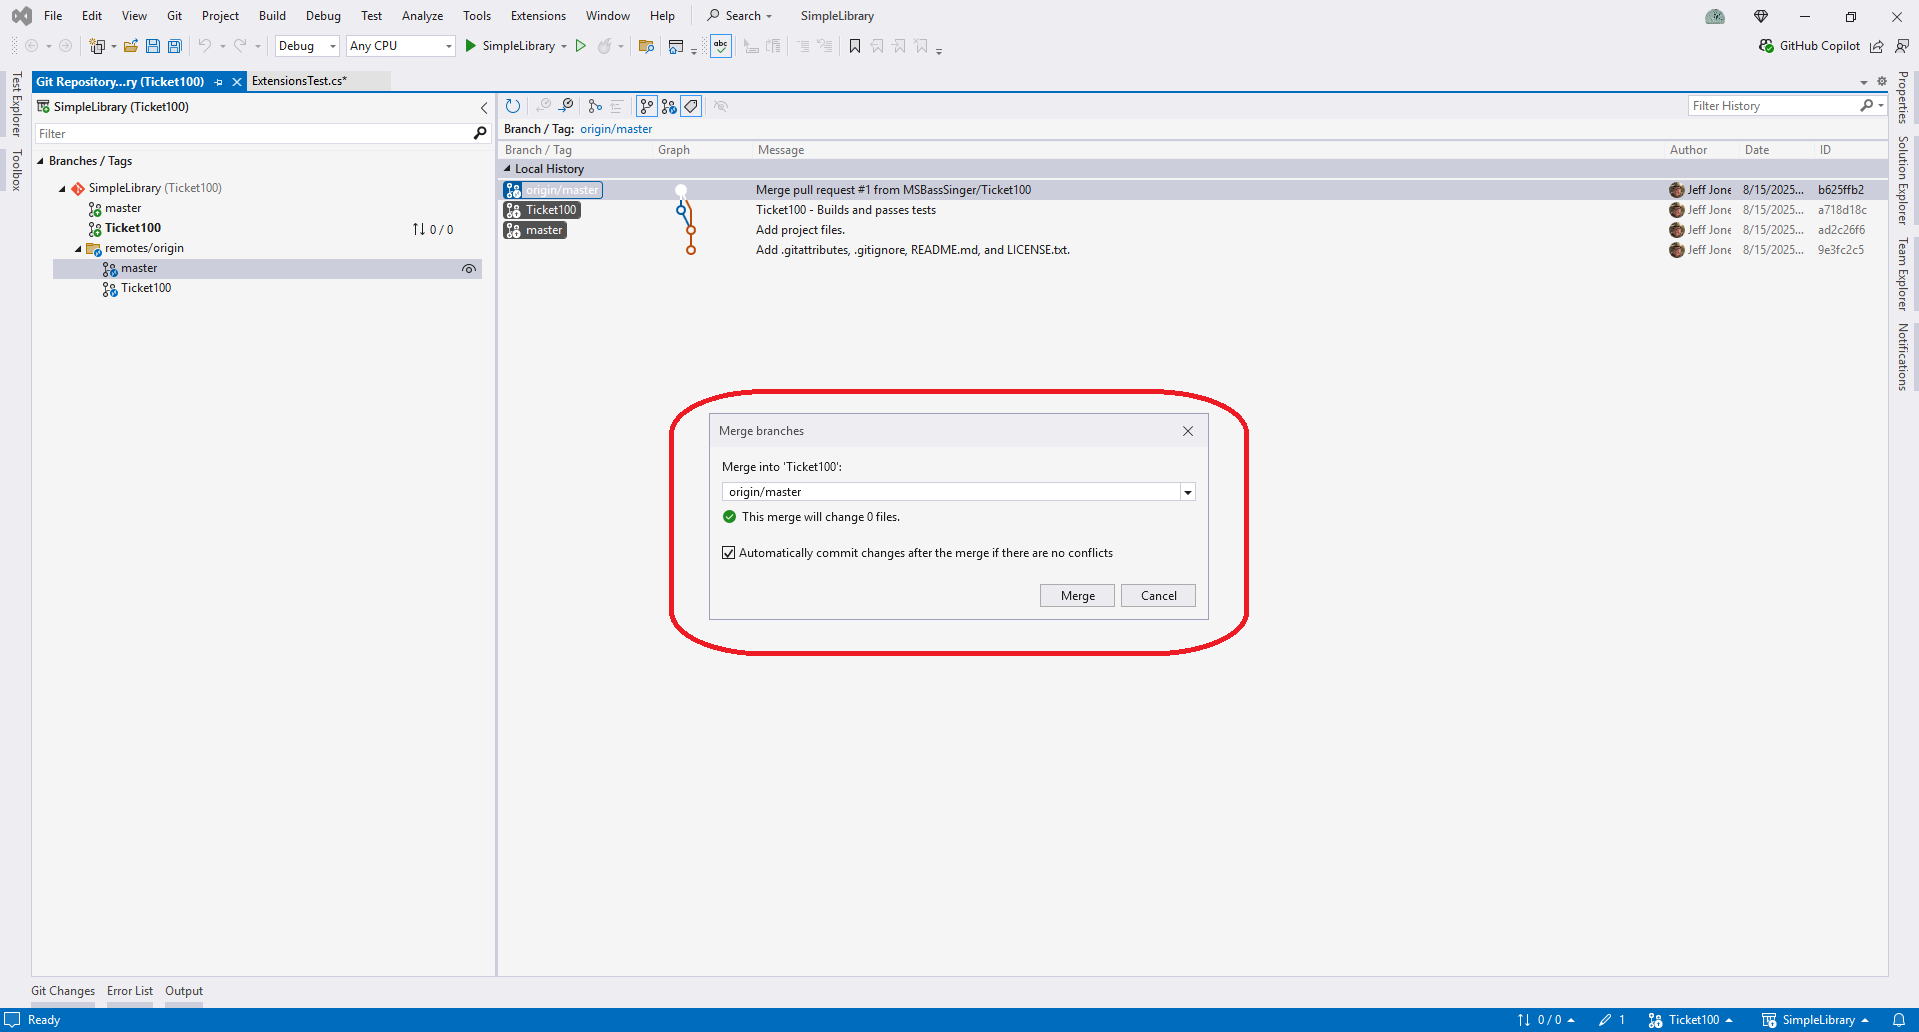
If the popup says, “This merge will change 0 files”, there is no reason to do a merge. If there are merge conflicts after the merge, it will be noted at the top, and you can use the built-in diff window to solve the merge conflicts.
Once done, with both (pull or sync remote working branch, and merge any main branch changes), you will have the latest available code and with few exceptions, eliminated future merge conflicts or overwriting another’s changes.
The code used in this article can be found in my GitHub.
Addendum - Adding a Test Project
While I do not recommend the backwards and time-consuming (and frustrating) process of defining your tests before your coding (one interpretation of “test driven development”, or TDD), testing by the developer is both a time saver and good, solid, engineering practice.
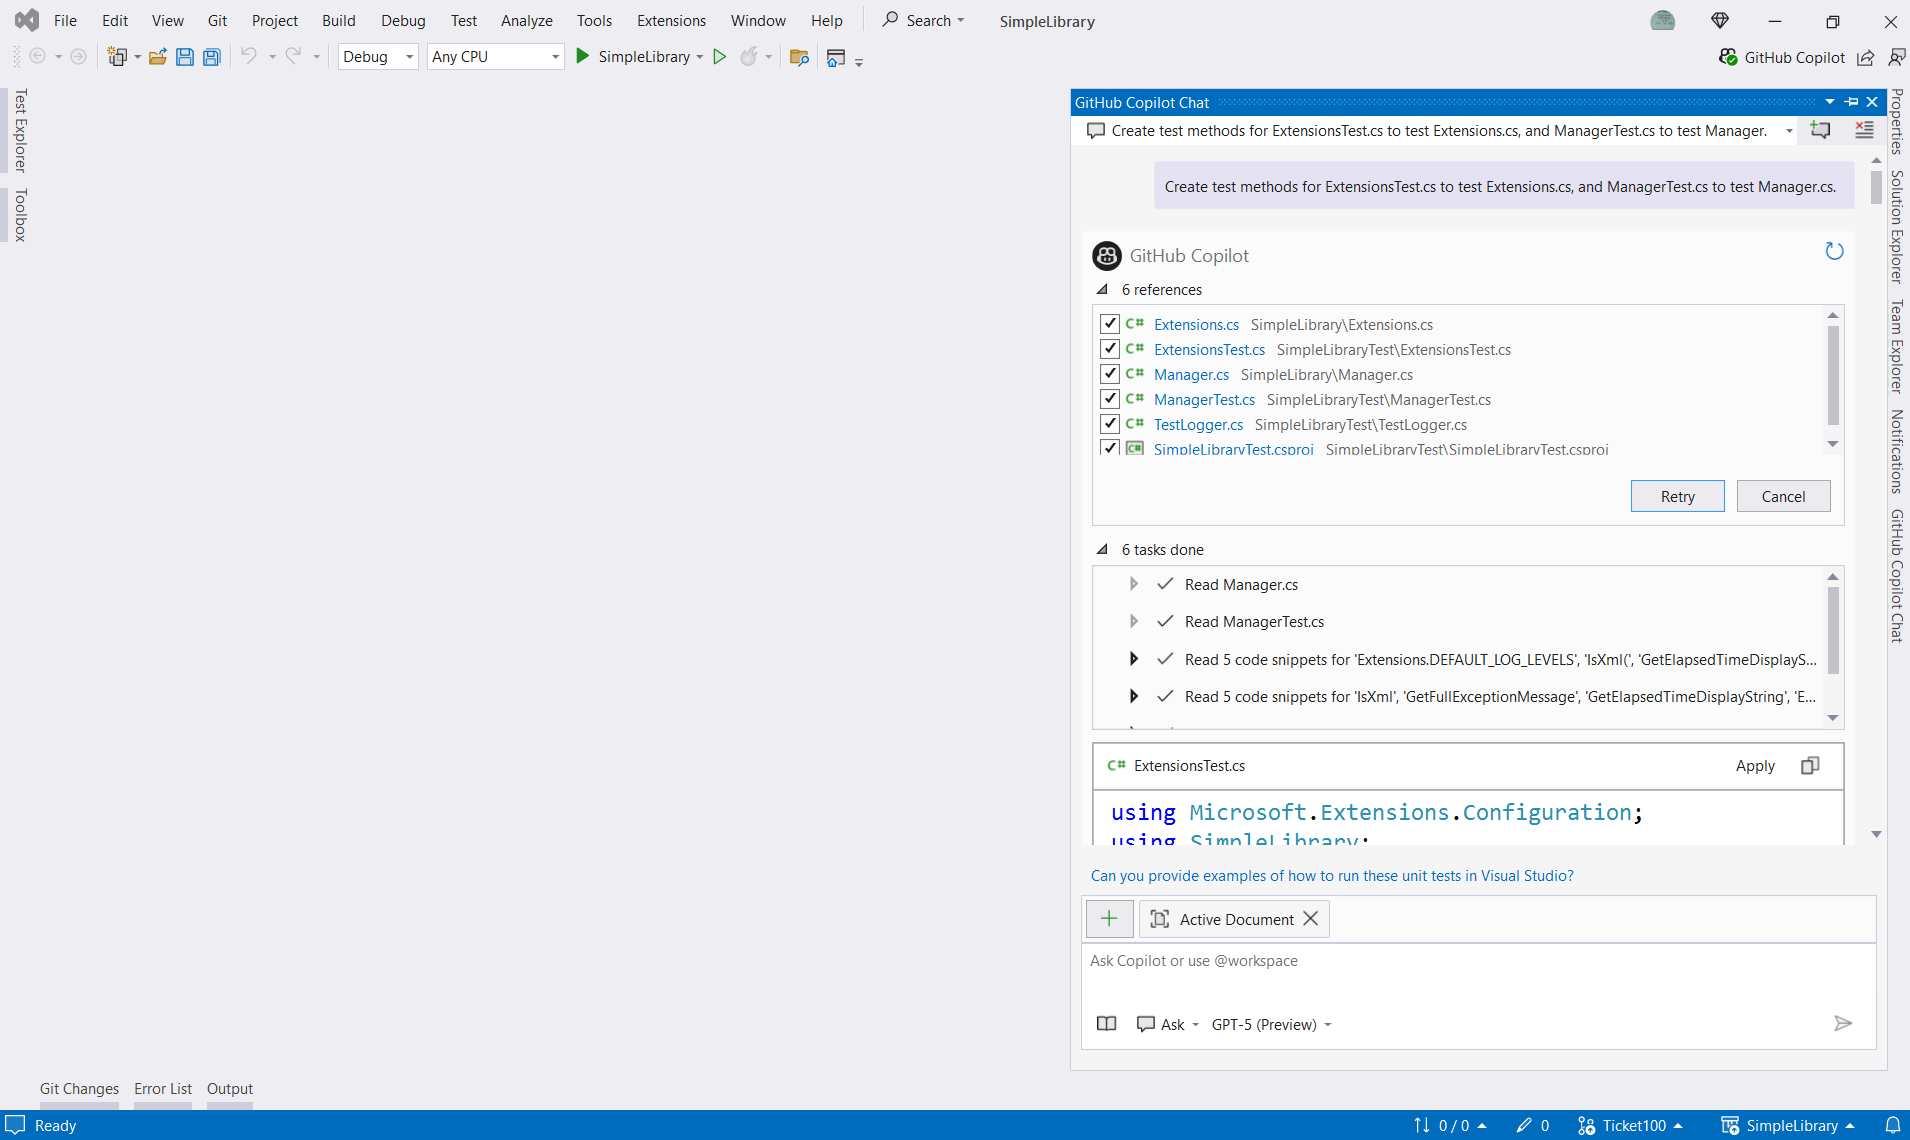
Creating a test project and populating it with tests is less time consuming today that in earlier years. The use of Copilot (the AI assistant in VS2022) can save a lot of time. The more specific you are about what you want, coding styles, etc., the better Copilot can help you generate testing code.
Here, I asked Copilot to create tests for me after I have coded what I want tested. This is one example of where coding the app before coding the tests helps make the tests more thorough.
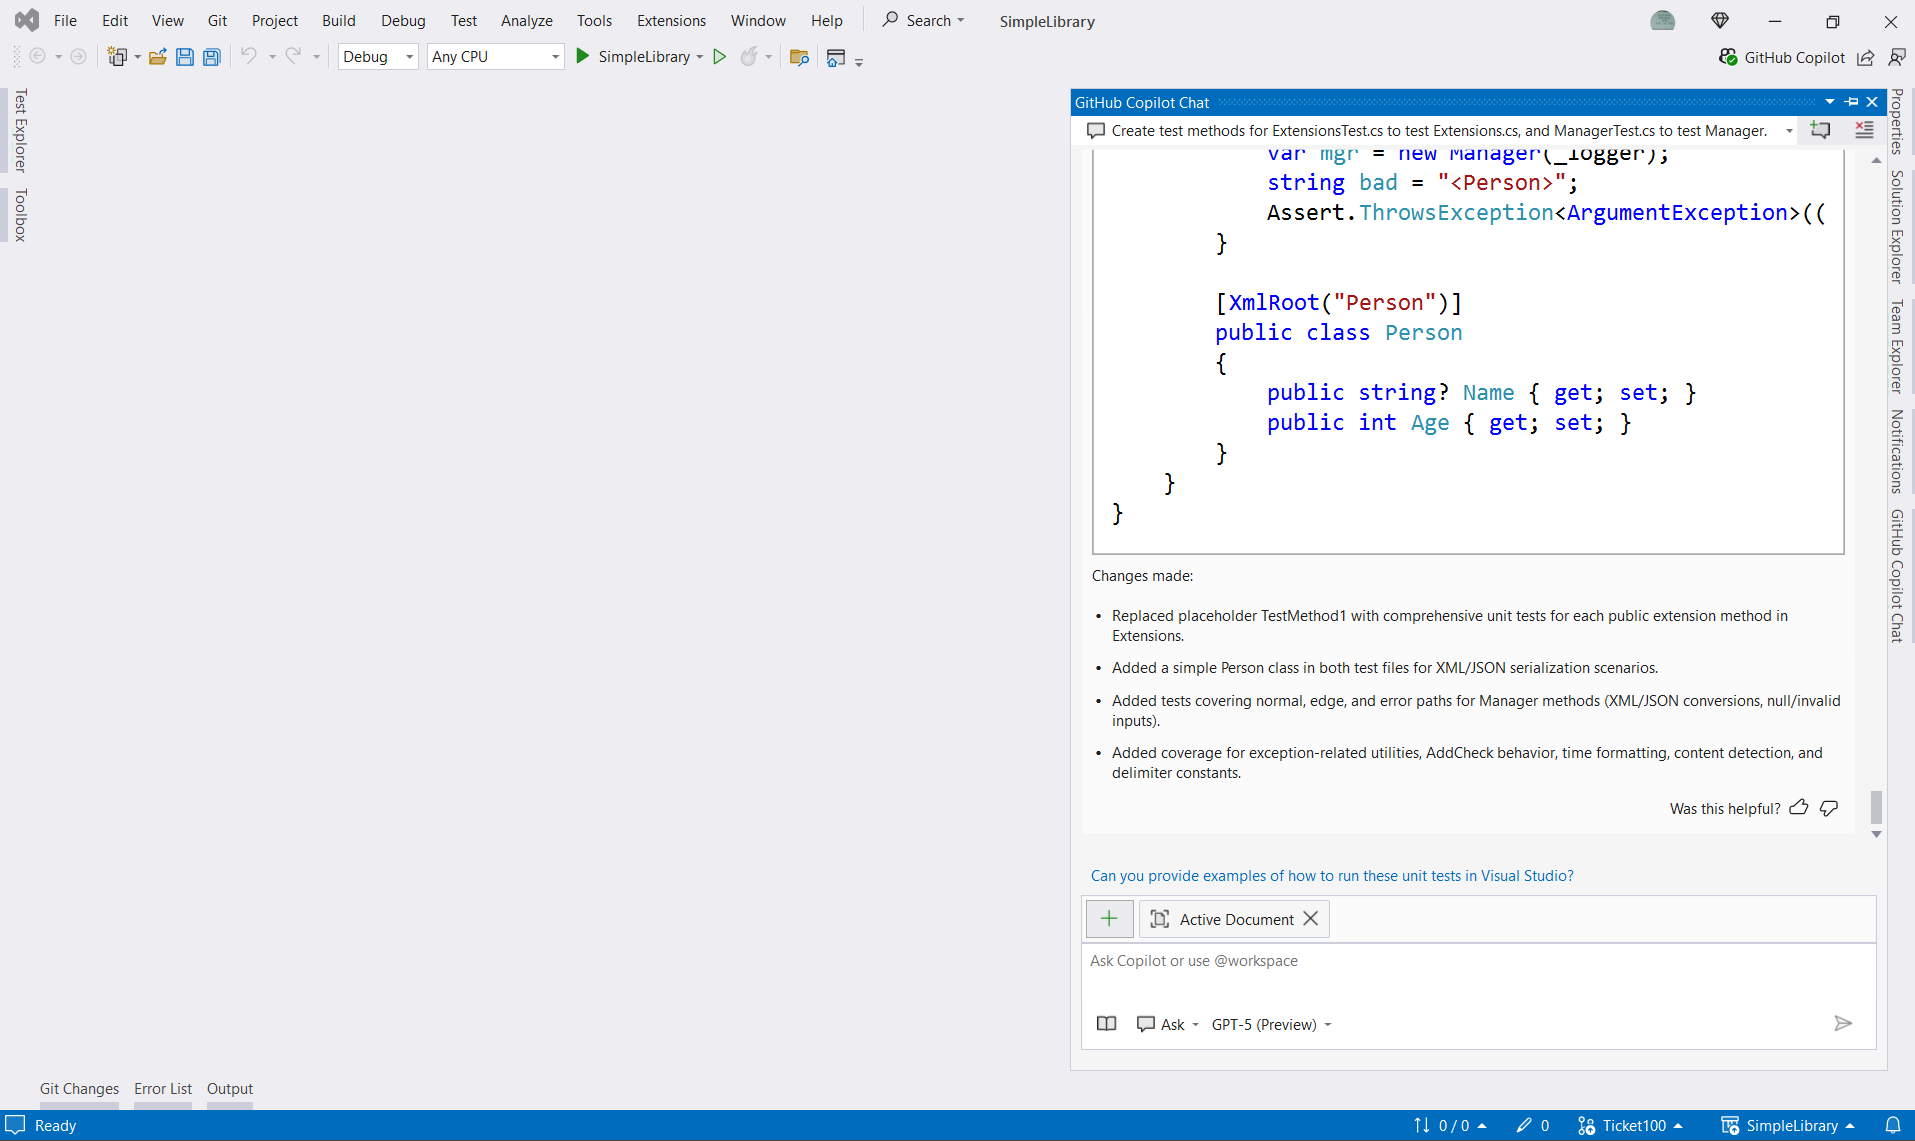
You can review the generated code. Then decide if you need to clarify or amplify what you wanted Copilot to create. For example, you may want try-catch logic, or to use a logger for testing that you define, among many other variations, then have Copilot regenerate the testing code.
After applying Copilot’s code, you can fine-tune it in ways AI cannot, and still you will have saved time.
NOTE: Many testing purists recommend only doing unit testing in the test projects, not end-to-end (or functional) testing. They recommend using “mocking” the data or processes that lie outside the units of code (e.g. classes) being testing. That is a valuable and necessary part of testing, but “mocking” opens up new opportunities for missing potential errors in your solution.
However, the goal of testing your code is to make sure it works in a variety of real-world scenarios in ways that are as close to production as possible. “Mocked” data and processes are not always a good choice and can hide potential errors. Using static data that represents a wide range of inputs is appropriate in many tests, but not all. Instead, use test versions of data sources and services instead of “mocked” versions. That allows better testing of the entire system the code solution is a part of, without reducing the testing benefit of unit testing. The cost of having a development environment with all the databases and services found in production (though on a smaller and cheaper scale) is usually less expensive than “mocking” and correcting the problems that brings.